
HONDA CIVIC REAR CONTROL ARM BUSHINGS
In 2001, the Honda Civic was totally redesigned, including the rear suspension, with those trailing arm bushings always end up squeaking over bumps. Well, for Civic owners who grew accustomed to their beloved squeaky Civic and thought of the noise more as an “audible rear suspension travel gauge” than a noise better suited to Jed Clampet’s truck, good news, the new generation of Civics squeak from the rear too!
Make it go away!
For those of us who would like their sleek new Civic to glide silently down the road, there’s also good news. Honda has issued an upgraded control arm bushing to fix the squeak.
If your car is still under warranty, any Honda dealer will install the upgraded bushings for free. If your warranty has expired, we’d be happy to install them for you. We keep a set of bushings in stock.
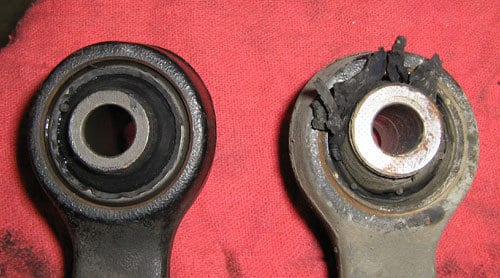
The old-style bushing (on the left) has a metal core covered by rubber. The new style bushing (on the right) has a metal core and a metal shell.
SAVE time (and money) by leaving the control arm in the car
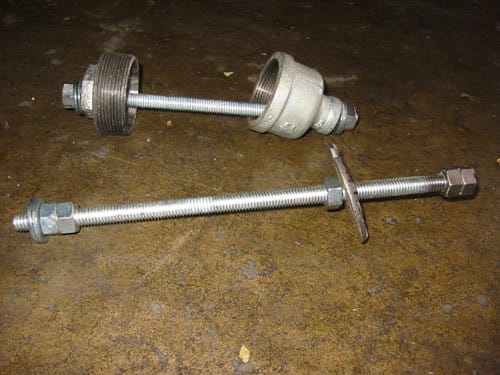
There are 2 special tools required to install the updated bushings. The tools are available from Honda. However, in the interest expediency (and thrift), we made our own. The tool on the bottom is for pressing the old bushing out. The tool on the top is for drawing the new bushing in. In days not so far past, making your own Honda tools was the only way to get them.
Now, Honda (much to their credit) has opened the door wide to supplying independent shops with everything available to the dealerships. Their reasonably priced web site has all factory manuals after 1996, service bulletins, and all you need to equip your shop with any tool available to the dealers.
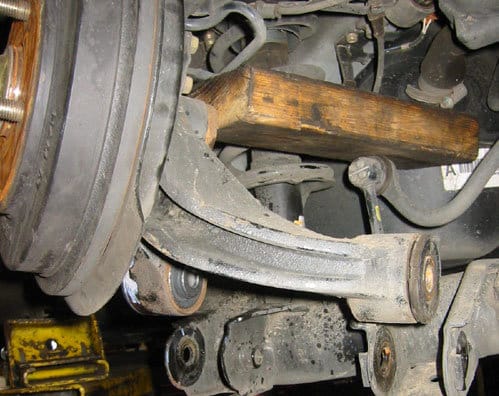
After marking the position of the eccentric alignment washers, the lower knuckle bolts are removed and knuckle is held away with a 2x4x8 block of wood. As long as the marking is done carefully, the alignment should not be changed after the procedure. This of course assumes the alignment was OK in the first place.
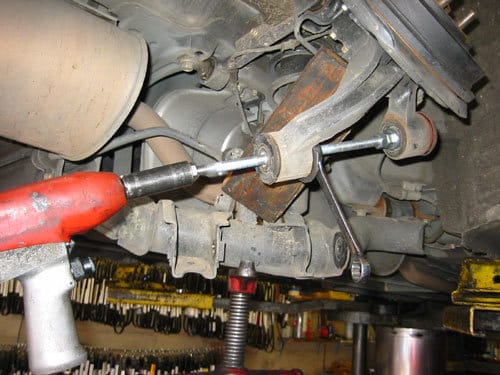
The bushings are then driven out. Since I made the tools myself the warning found on most drivers & pullers, “not for use with air tools”, is missing. Yet another advantage of building your own tools 🙂
New control arm bushing installed
With the new control arm bushing installed, the arm looks a whole lot better and the car will bounce silently down the road with no annoying squeaks.