
Once I figured out how to repair Prius combination meters with the infamous “blank speedometer”, I thought it might be nice to learn to program the mileage so that I could make exchange units. I have a tool that handles mileage correction for many cars. It’s menu driven and all the user needs to do is press some buttons and enter the desired odometer reading. Unfortunately it won’t work for the Prius.
I had purchased an EEPROM reader for another project and figured I’d try to figure out how to edit the hex code directly. I imagined that if I had a combination meter with known mileage I could convert the mileage from decimal to hex and then search for that data the dump and edit it. As it turned out, it’s nowhere near that easy.
Where is the odometer data stored on the Toyota Prius?
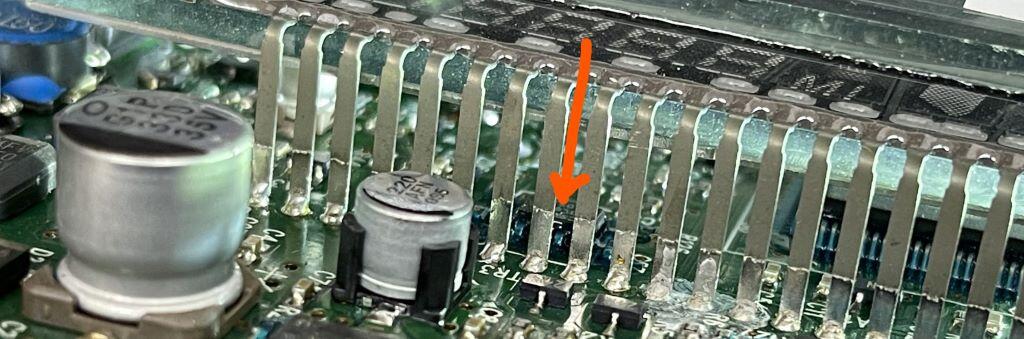
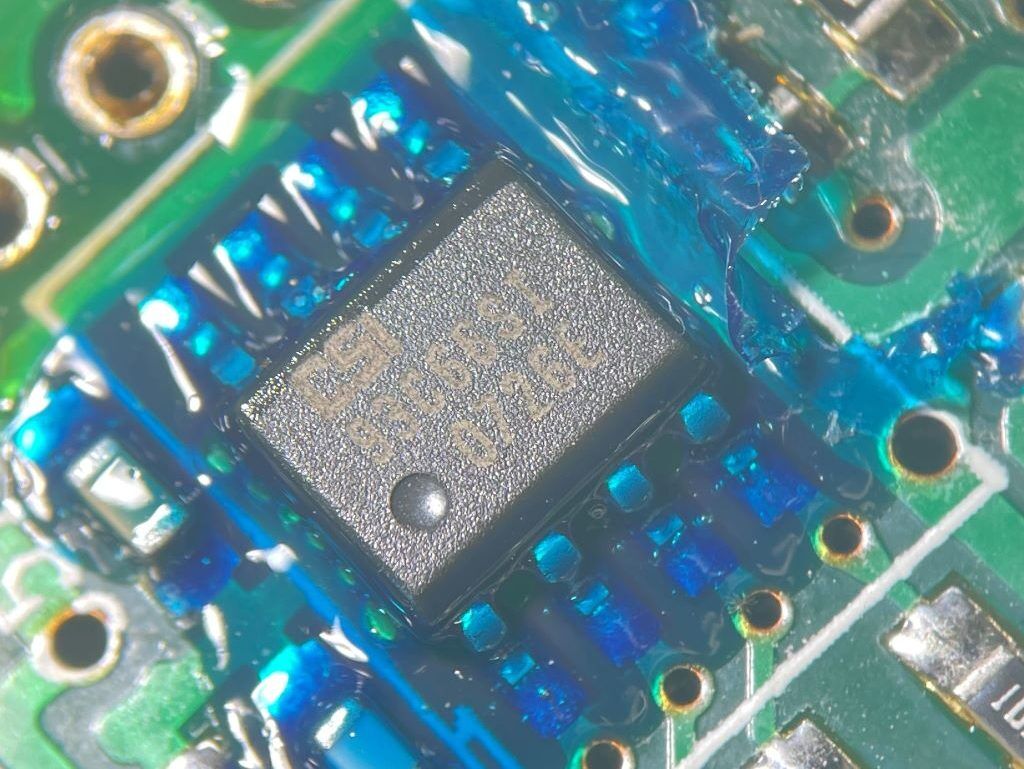
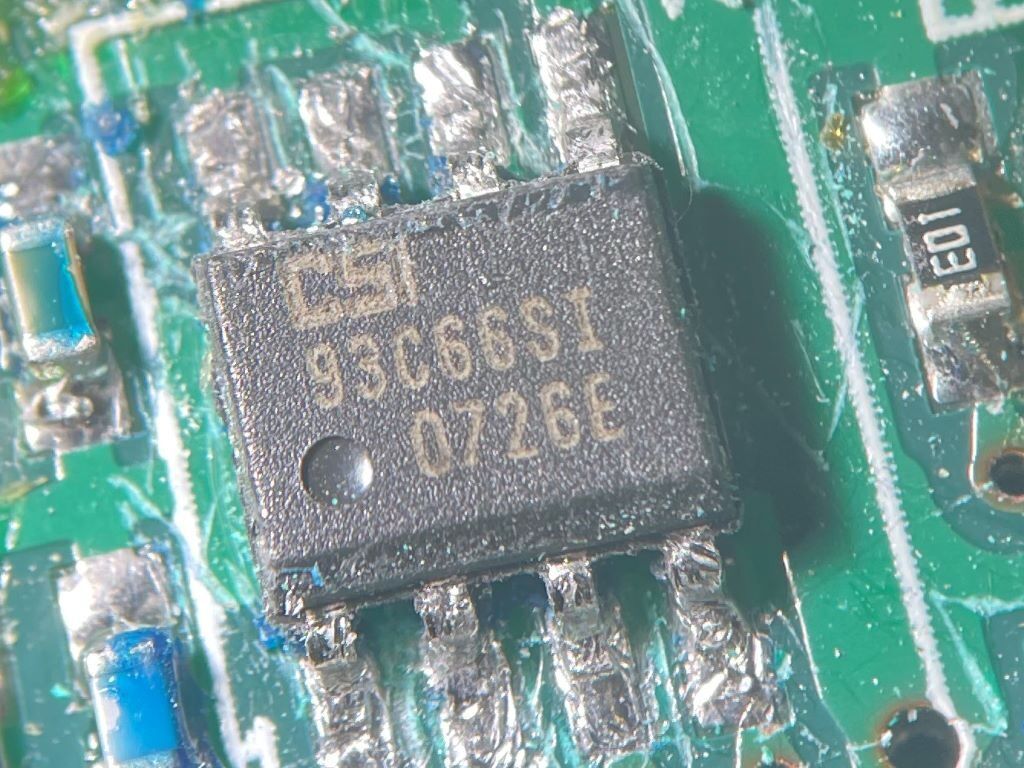
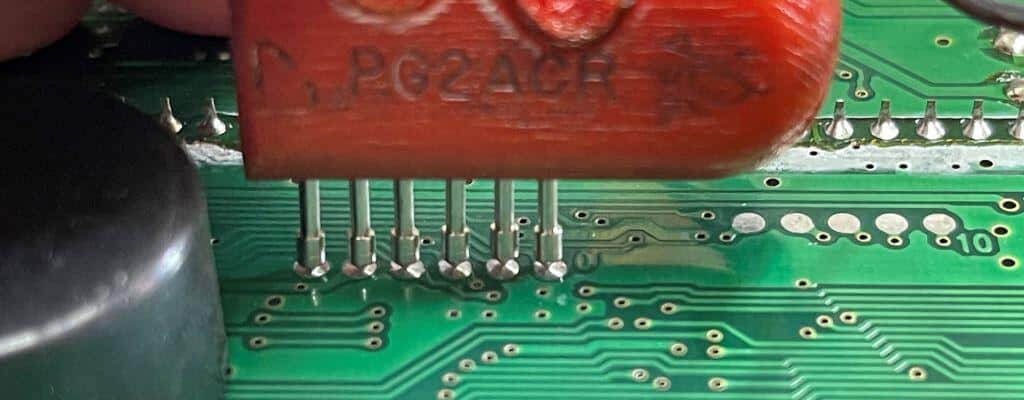
The Prius combination meter stores the odometer reading as well as other configuration data in a 93C66 EEPROM conveniently located under the LCD, which is attached to the board with 75 through-hole pins. If you plan to remove one, stock up on solder wick and patience. Once you get the LCD off (it took me 30 minutes of non-stop de-soldering), you’ll need to remove the solder mask on the pins of the 93C66, which add another layer of tedium to the job.
Are you ready for the good news? I inhaled lead vapor for 30 minutes, dropping IQ points I can scarcely afford to lose, so you won’t have to. I assumed at the start that the pins of the 93C66 would be connected to some of the easily-accessible test pads on the back side of the board, but which ones. The only way to find out was to gain access to the chip and check with an ohmmeter.

How odometer data is stored on the Prius
The odometer reading is stored in a 4 digit hex code. You may be wondering how this could be possible since the largest number that can be stored in a 4 digit hex code is 65,535 (FFFF). With the Prius odometer, they multiply the 4 digit hex code by 17 to arrive at the actual mileage reading. Therefore the hex 1673 (5,747 in decimal), would be 97,699 miles (17 x 5747).
Toyota just repeats the hex code 17 times in the EEPROM data. So, 97,699 = 1673, 1673, 1673, 1673, 1673, 1673, 1673, 1673, 1673, 1673, 1673, 1673, 1673, 1673, 1673
But what if your mileage is 97,700. The next whole number up from from 1673 (5747 in decimal) is 1674 (5748 in decimal). 17 x 5748 is 97,716, over-shooting the desired mileage by 16 digits. Obviously the odometer must increase by increments of 1, not 16. How is this done?

In the data above, 1673 is repeated 10 times, then 1672 is repeated 7 times.
1673 is 5747 in decimal. 10 x 5747 = 57,470
1672 is 5746 in decimal. 7 x 5746 = 40,222
57,470 + 40,222 = 97,692, and that’s what the odometer will read. The larger numbers are added left to right, top to bottom, just like you read.
But I tried that and it didn’t work!
Everything above is correct, but it won’t work. I mixed and matched combinations of 17 hex codes, but the odometer reading just wouldn’t change in increments of one. However, in some combinations it would change, but not by one. I could only get 3 different mileages using any combination of 2 hex codes.

This next part I call the “mask”. Every time a one of the spaces is filled with a hex that’s 1 more than the original, a spot in the “mask” is changed from 0000 to FFFF. The mask is 17 spaces and starts where the odometer data ends.
How to write to the Prius combination meter EEPROM
We’ve covered where the EEPROM chip is, how to access the chip pins without removing the LCD, and how to understand and modify the odometer data in the hex code. Now I’m going to talk a little bit about the basics of reading and writing to the EEPROM. I’m only going to cover the basics because that’s all I know. A month ago I was an EEPROM virgin, so my knowledge is pretty limited. However, sometimes newbies do a better job of explaining the basics, since folks with experience sometimes fail to cover the stuff that seems self-evident to them.
You’ll need an EEPROM reader. You can buy these XGecu EEPROM programmers from EBay and Amazon. They come with a link to buggy software, which Windows Defender is convinced contains a virus. I think its a great deal for what you get, but you’ll need to spend some time figuring things out and watching YouTube videos. If you want something more automotive specific and with guided instructions, check out Andromeda Research Labs.
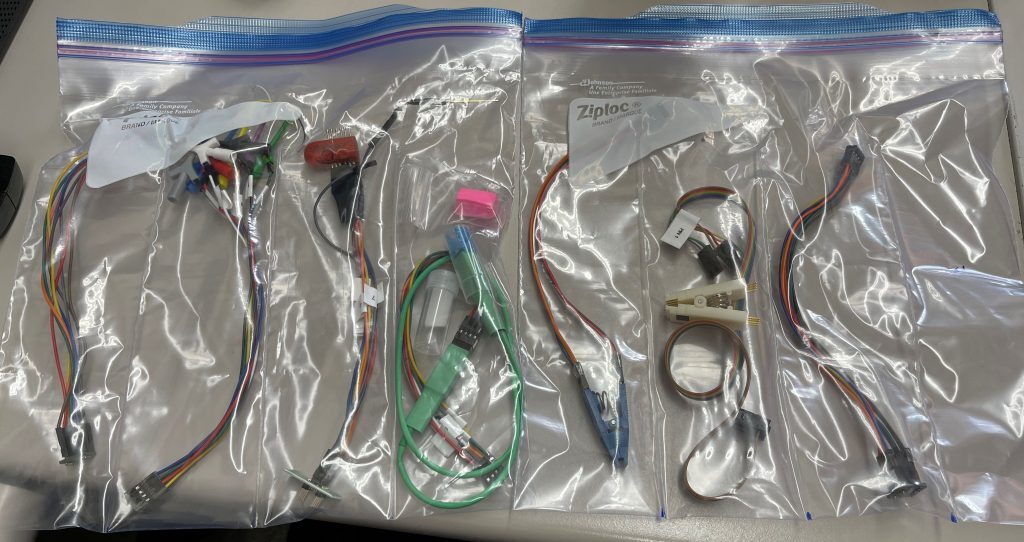
Making jumpers for fast set up
At first I just soldered wires to the test points on the board. I ran jumpers to an adaptor that came with the EEPROM programmer, which had pins that fit neatly in the ZIF socket on the programmer.
It was a lot faster than getting to the chip behind the LCD, but still too time consuming to make any money doing the job.
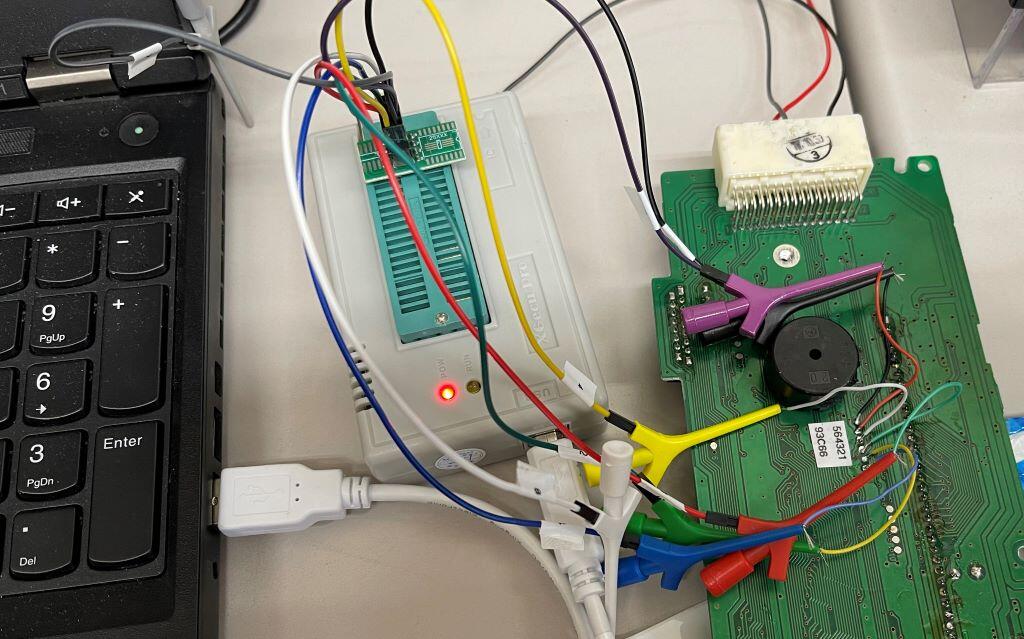
I made a pogo pin adaptor out of an old pocket screwdriver handle by drilling holes spaced .100″ apart. I used a mill with a DRO, but I imagine you could do it by hand with a little patience.
You can buy spring-loaded pogo pins on Amazon or EBay in different sizes.
In my month of EEPROM adventures, I’ve already set up several adaptors for both in-circuit and out of circuit programming.
It takes a little longer to set up the pigtail for the first chip compared to just running jumpers, but every subsequent job will be faster.
Testing your Prius Odometer correction results
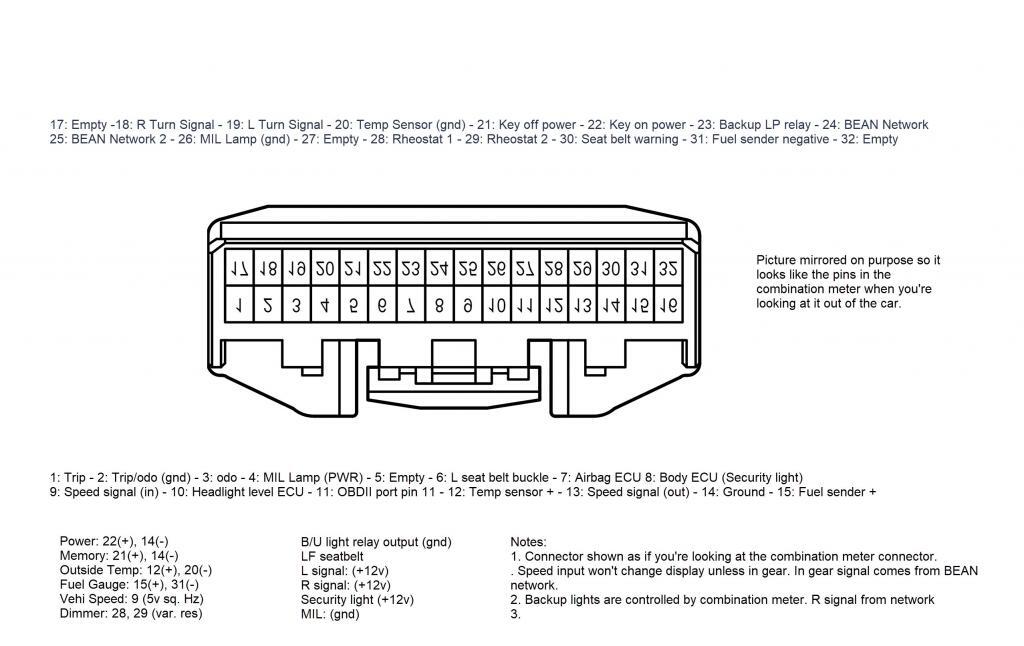
Obviously you wouldn’t want to wait until the odometer is installed to make sure you got the mileage right, so checking on the bench is essential. For that, you’ll need a pinout. Here’s one that I created with data I found on Toyota’s information website (TIS).
Apply 12V+ to pin 22 and 12V- to pin 14 and the meter should display the mileage. Unfortunately there’s no way to check for speedometer and odometer function. You can apply a 5V square wave to pin 9 (frequency equal to MPH), but unless the car is in gear, the speedometer won’t move.
The HV ECU sends the gear signal to the gateway ECU, and the gateway ECU sends it to the combination meter over the BEAN network on pins 24/25 and I have no idea how to create that. That’s actually something I’d really like to learn how to do (record and replay or create network traffic), but for the time being I have no idea how one might go about that.
Good luck!
If you’ve read this far, I assume you’re going to give it a go. Good luck with your Prius odometer adventure!
You may also like some of these links:
A misadventure with a Subaru immobilizer system and keyless entry
Nearly everything I know about micro-soldering I learned from Northridge Fix and his YouTube channel. There wasn’t a lot of mirco-soldering on this job, but I wouldn’t have been able to remove that LCD without what I learned from him.
This isn’t electrical, but it is a story of fixing the unfixable.
Here’s an electrical repair on a much larger scale. Repairing a Toyota Hybrid inverter.