Art’s Automotive in Berkeley provides many types of driveline services for Toyota, Honda, Subaru, and Mazda, including CV boot replacement, axle replacement, U-joint replacement and driveshaft replacement.
On this page, we’ll walk you through how CV boots, CV joints, and axles can fail, the repair options available, and what’s involved in getting your car working properly again. You’ll learn about common symptoms of CV and axle issues, how to spot them, and how to determine whether a CV joint re-boot or axle replacement would be the best option for you.

Why Choose Art’s for Axle Service?
We’ve been repairing CV boots and axles in Berkeley for over 40 years. Back in the 80s and 90s, axle replacement was very expensive, and rebuilding axles made a lot of sense. Starting in the 2000s, very low-cost axles became available from Chinese manufacturers, and replacing an axle became cheaper than rebuilding or even rebooting an axle. However, what we quickly discovered was that the quality of some of the new aftermarket axles was very poor.
At Art’s Automotive we stand behind our axle repairs, so choosing a quality product is very important so us. If we buy and install a poor-quality product, it will cost us money and damage our reputation, so we put a lot of time into selecting the best axle for your car. For some vehicles we’ll only use OE axles purchased from a dealership because we know from experience that there are no good aftermarket axle alternatives. Many Subaru and some Honda vehicles fall into this category.
Obviously, we don’t want to be known as the “expensive shop”, so for the majority of cars we’re happy to use an aftermarket axle. And if there are any issues, we’ll stand behind our parts and labor warranty and replace it at no charge. However, through experience we know what’s good and what’s not, and these days we have very few issues.
What is a CV boot and what does it do?
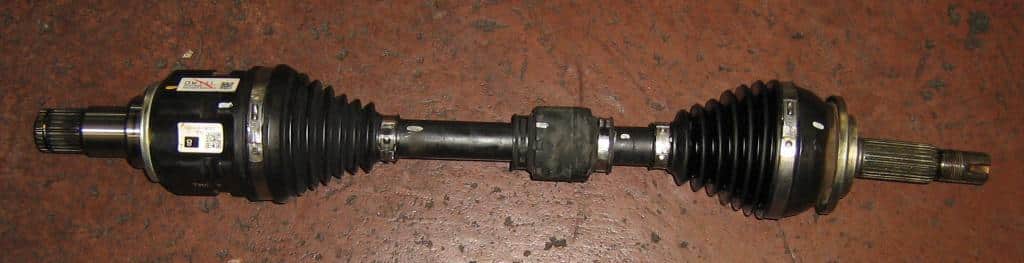
Let’s start with the basics. A CV boot is a flexible rubber boot which protects the CV joint. What’s a CV joint? It’s a flexible joint found on both ends of the drive axle. The outer joint allows the front wheels to turn and move up and down. The inner joint allows the suspension to move and the axle to telescope in and out. The CV joints are packed with grease. The CV boots protect the joints. They keep the dirt and grit out and the grease in.
How do I know if my CV boot or axle needs replacement?
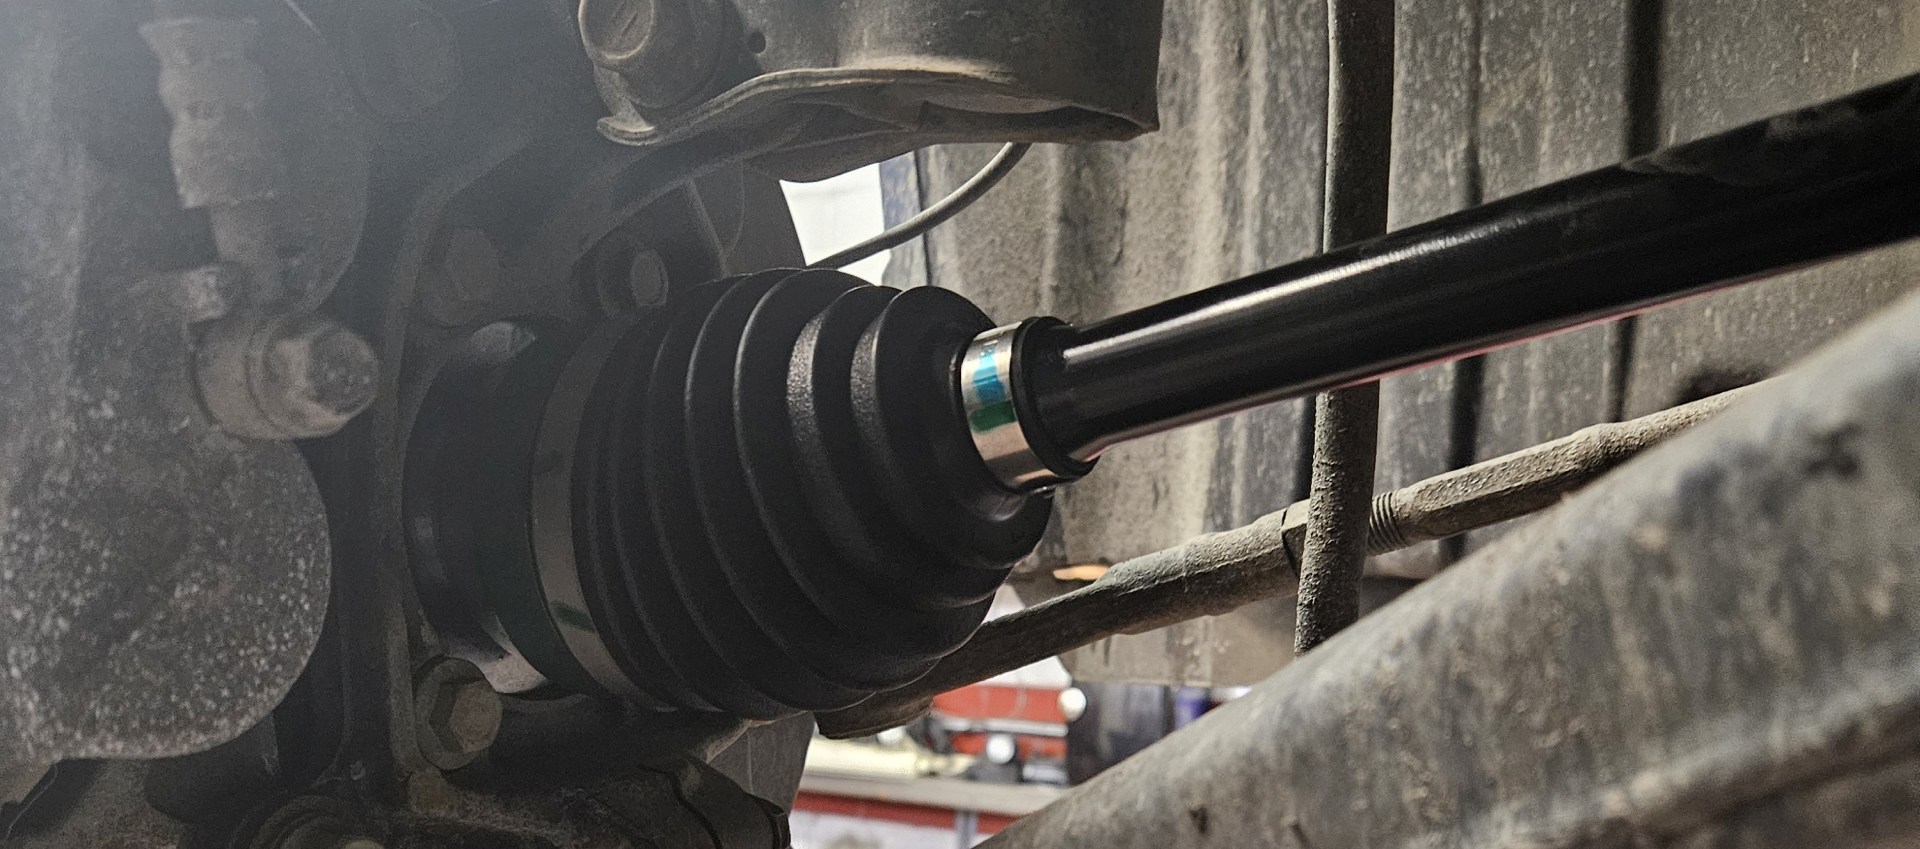
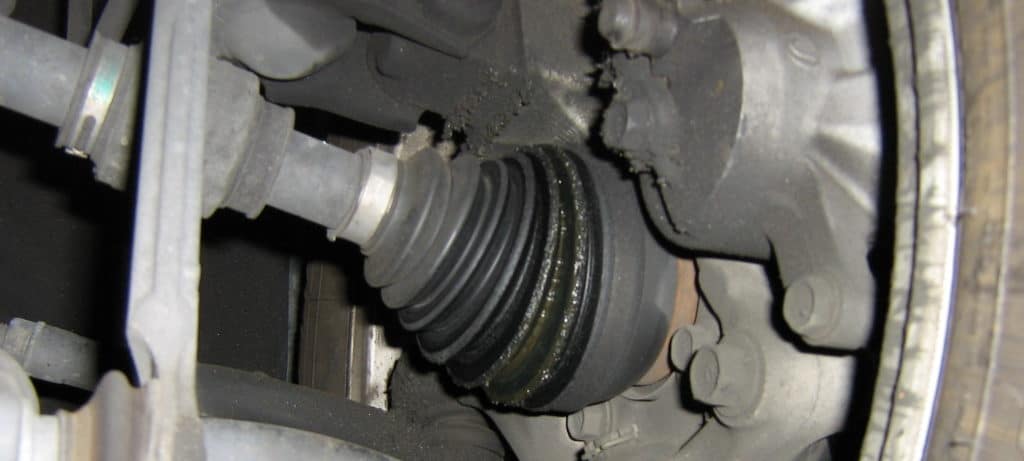
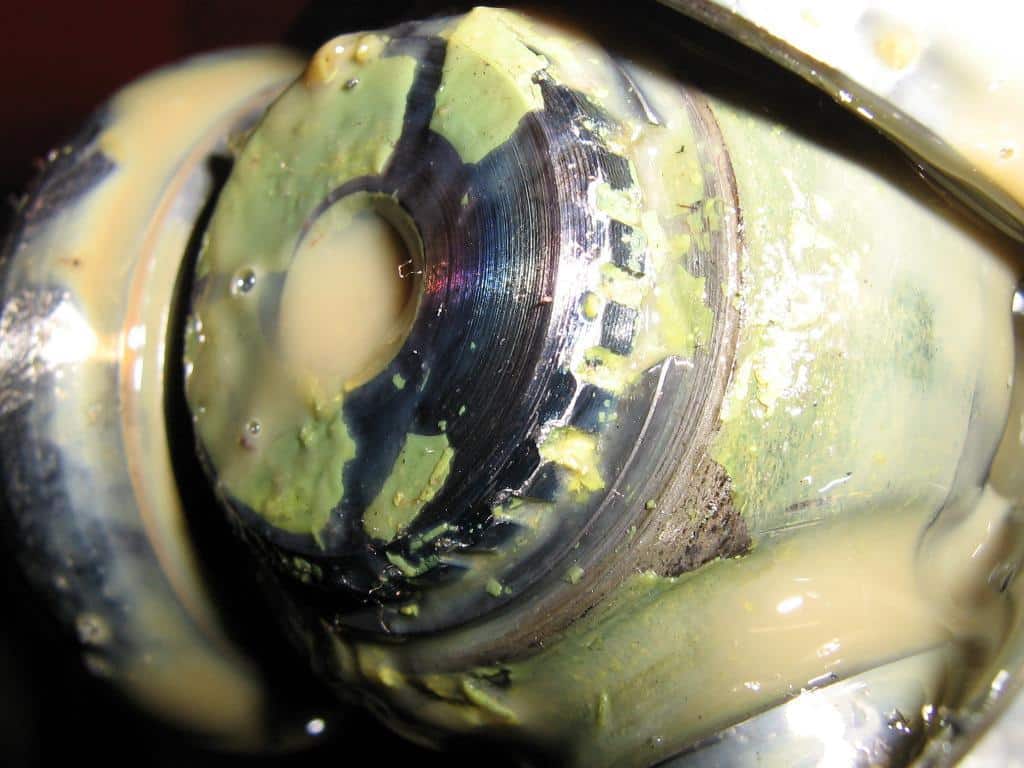
When a CV boot fails, you’ll likely see grease on the boot and as the leak gets worse. Since the axle spins, the grease will fling and get all over the inside of your rim. Usually (but not always) a leaking CV boot is the cause of a bad axle, so if you catch a torn CV boot early, it may
When the CV boot fails, the only way you’ll be able to tell is by looking under the car. If you bring your car to us for service, we’ll always check your CV boots during your car’s service. If the axle fails, symptoms will alert you that there’s a problem.
Symptoms Of A Bad Axle
- Clacking noise when accelerating during tight corners, like when making a u-turn
- Wobbling feeling when accelerating in a straight line. This is especially common with Subaru and some Honda vehicles.
Can I just replace the CV boot, or do I need a whole new axle?
Whether it’s better to replace the CV boot or install a new axle depends on a couple factors:
How much an axle will cost for your car. Axle prices vary car to car. Surprisingly, it can actually be cheaper to replace an axle than to install new boots on the original axle. If a good quality axle is available at a price that’s fairly close to the cost of replacing the CV boot, then it makes more sense to replace the axle.
How long the CV boot has been torn. If the CV boot has a hole large enough for road grit to get into the joint, your cv joint is going to be at least somewhat worn even if it’s not making noise yet. If the boot looks like it has been torn for a while, then it probably makes more sense to get new axle assuming the price for a new axle is reasonable.
Has the axle already failed. If your car is already making a clicking noise in tight turns or wobbling when you accelerate, there’s no point in rebooting the CV joint. A new axle is the only good choice.
Can I Keep Driving With a Bad Axle?
A bad axle can certainly make a lot of scary sounding noise when you’re turning, but as bad as they sound, they seldom cause a breakdown. In all my years is an automotive mechanic, I’ve only seen two broken axles.
So, should you fix your axle? Yes. Must you fix your axle? Well, if you can’t afford it, it’s pretty likely your car will hold together until you can.
Replacing a CV Boot
It Usually Starts With a CV Boot Leak
The first sign of trouble is grease leaking from the black rubber boot on the inside of the wheel, often flinging onto the brim and suspension parts surrounding it.
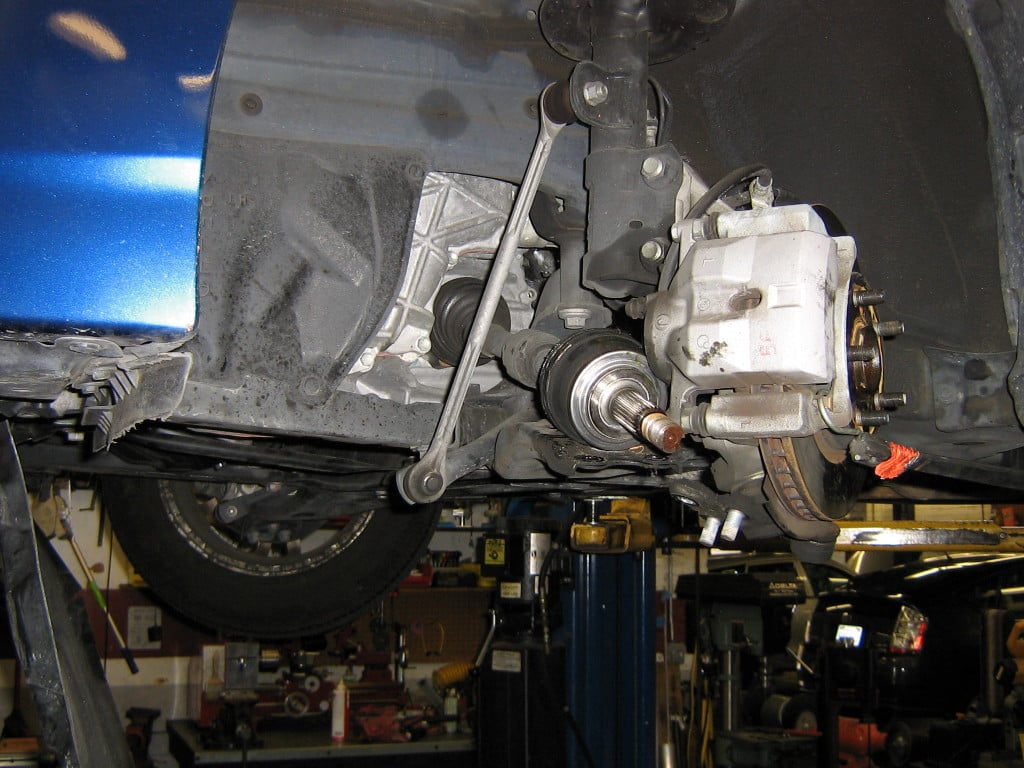
Removing the axle from the car
The first step is to remove the axle from the car. The axle nut will usually be staked in place as a safety measure. It’s best to de-stake the axle nut before removing it. Some axle nuts are so beefy that they’ll tear up the threads on the way off. KTC (the Japanese equivalent to Snap-On) makes a great de-staking tool that makes the job a lot easier.
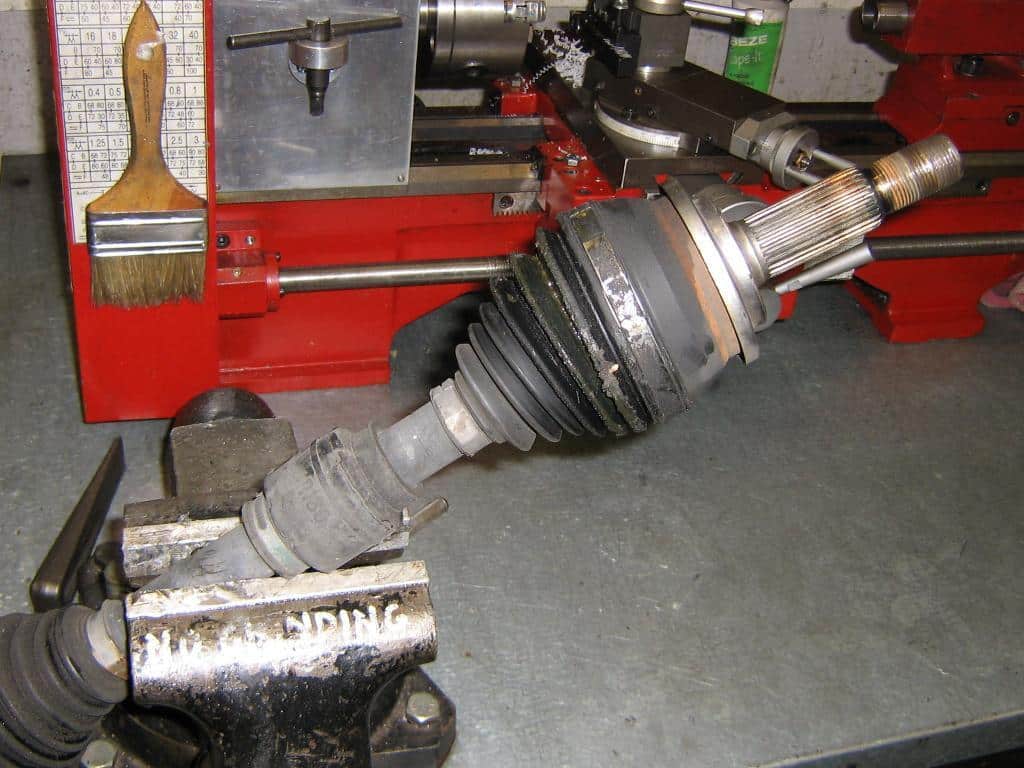
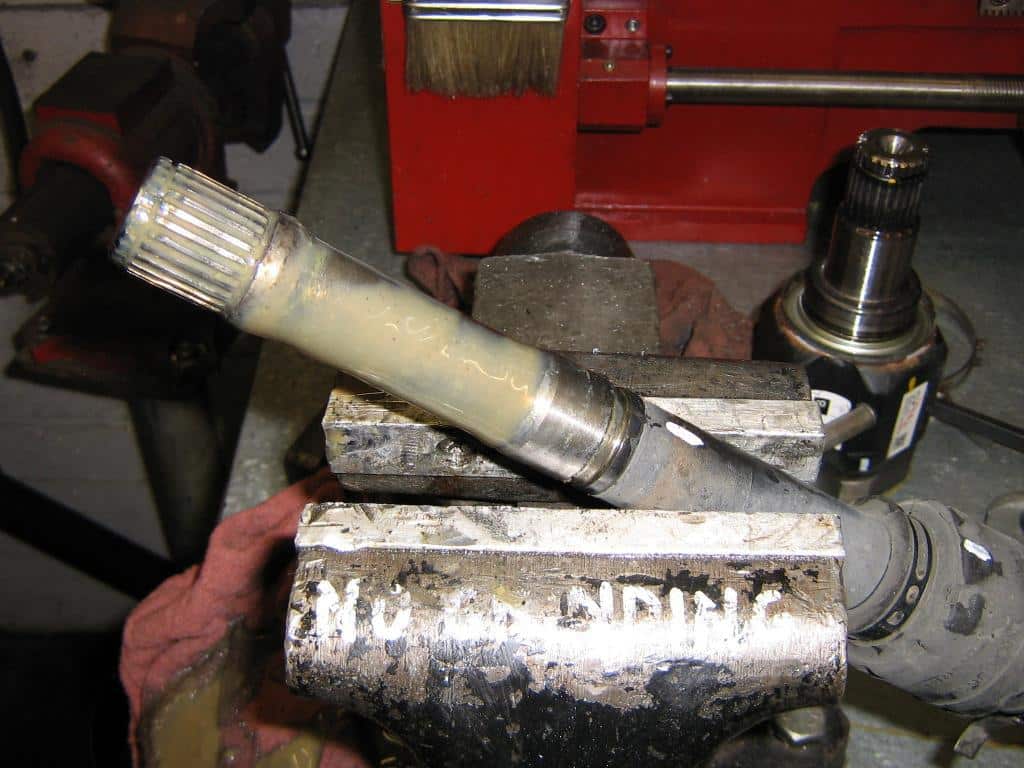
Hold the axle in a vice
Once the axle has been removed, we put it in a vice. This makes is a lot easier to work on the axle. If the axle is rolling around on the bench, it’s a lot harder to deal with the clamps and clips.
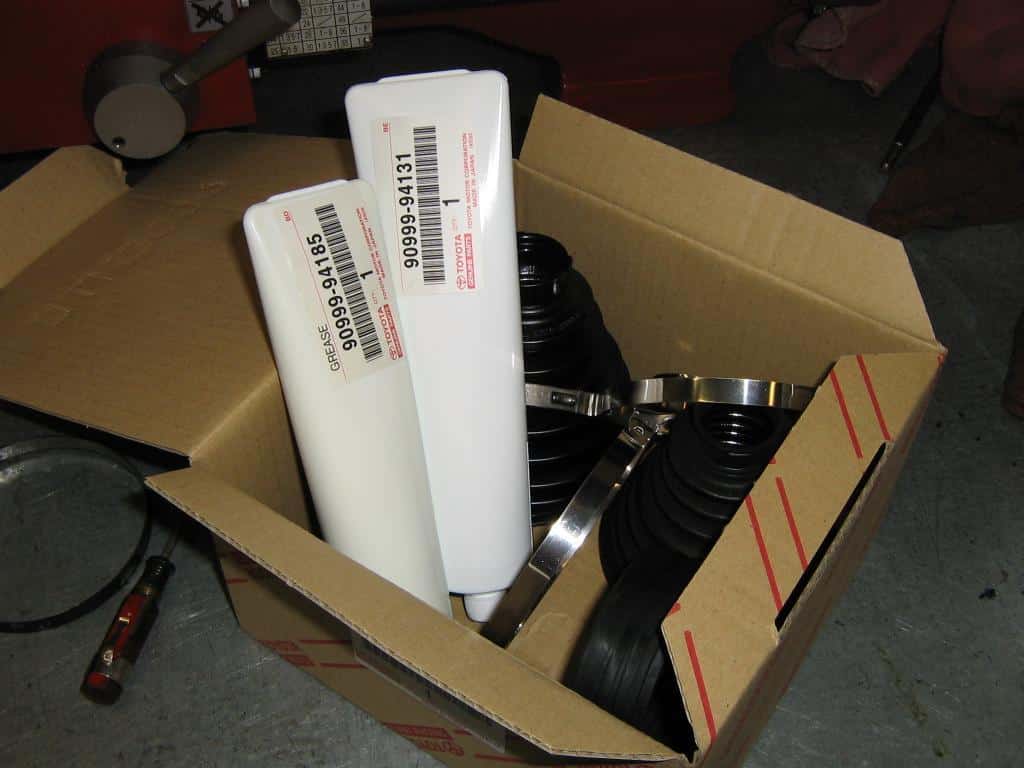
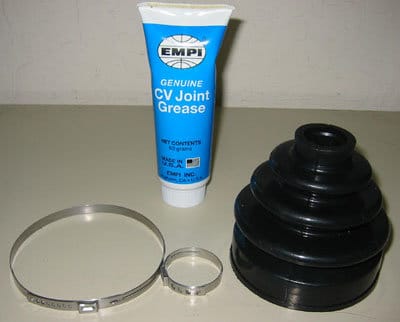
The best brand of CV boot
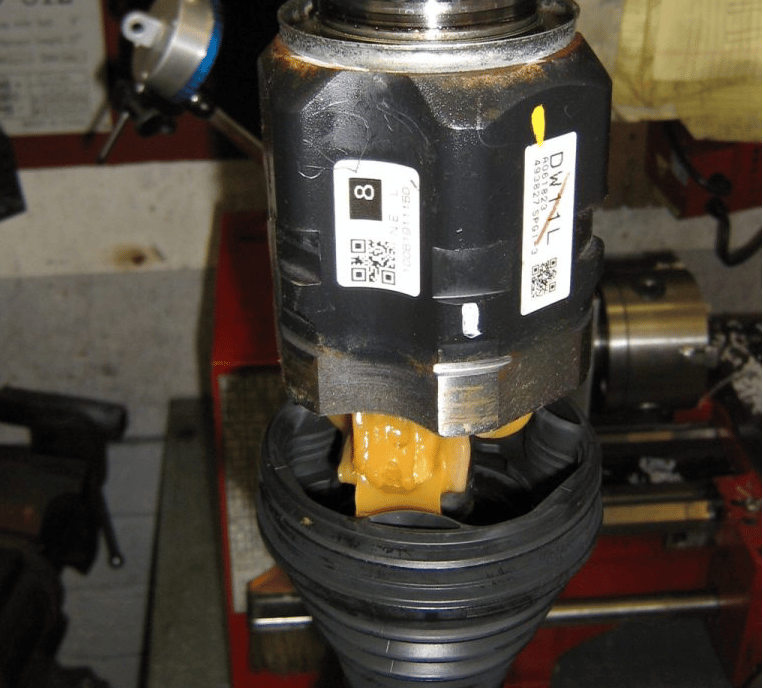
When possible, we like to use genuine CV boot kits. This kit from Toyota comes with all of the boots, grease, clamps, and clips necessary for the job. Notice that there are two tubes of grease, each with a different part number. Apparently, a Toyota engineer decided that the inner CV joint needed a different grease than the outer. You certainly won’t get two types of grease with an aftermarket CV boot kit. The clamps and boots are also top quality.
HOW DO YOU REMOVE THE OUTER CV JOINT?
Some axles have removable outer CV boots, but the Prius does not. To replace the outer CV boot, the inner joint and harmonic dampener must be removed, then the old boot can be removed, and the new boot can be installed by sliding it down from the opposite end of the shaft.
This is why Toyota doesn’t sell the outer boot alone. One other axles the outer CV boot will pop off with a sharp blow. A small snap-ring holds the race to the axle shaft and a blow to the inner race will push the CV joint past the circlip.
However, if you try that with this axle you’ll end up frustrated, with a broken axle, or most likely both.
There is no good way to tell the types apart by looking. You’ll need to check the service manual for the car you’re repairing to find out how it’s set up.
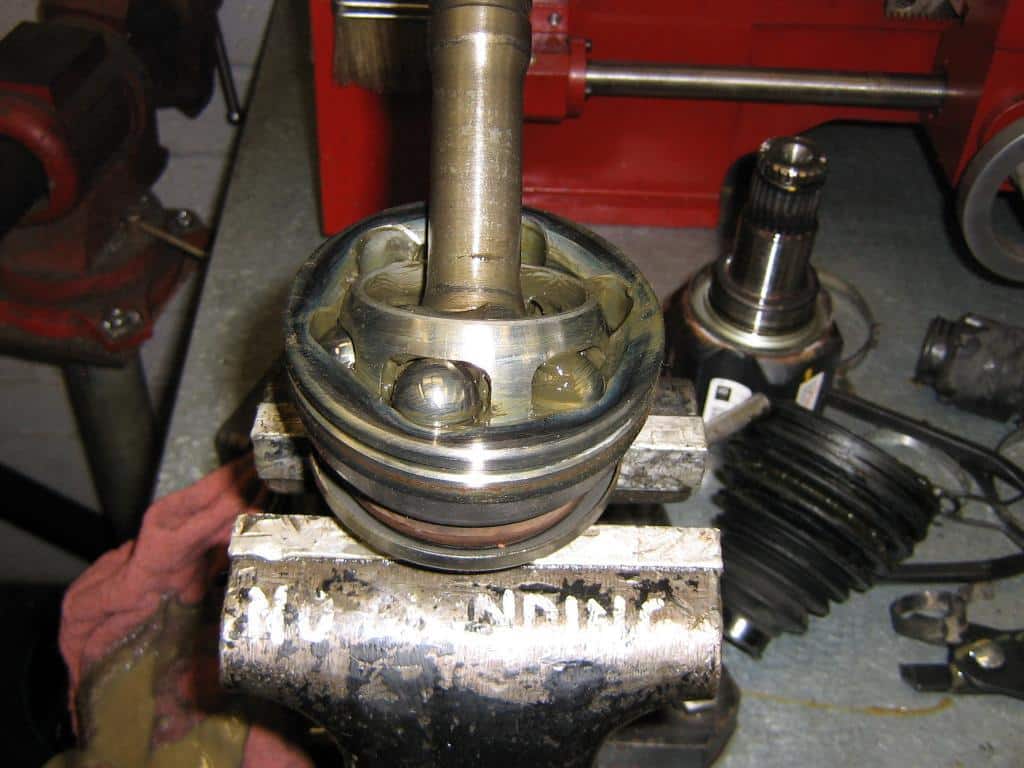
Remove the inner CV joint
The inner joint is indexed to the shaft with splines cut into both the shaft and the tripod joint. A circlip holds the joint in place.
Remove the circlip to remove the joint. Toyota provides a new circlip in the CV boot kit (and they should be replaced every time they’re removed).
The outer CV joint removed
The inner joint is indexed to the shaft with splines cut into both the shaft and the tripod joint. A circlip holds the joint in place.
Once the circlip is removed, the inner joint slides off, followed by the damper, then the outer boot.
Clean the CV joint
Once the boots are removed, we can start cleaning. I’m not a fan of using a solvent tank to clean the joint for two reasons. First, this can introduce dirt into the joint, and since the joint cannot be disassembled, there’s no guarantee any dirt introduced can be flushed out. Second, solvents used for tanks does not evaporate easily, so some will remain in the joint and dilute the grease. If the boot was mostly whole and there is no road grit in the joint, wiping the old grease off is the best option. If gritty, the best option is a flush with brake cleaner. Brake cleaner is clean, unlike solvent in a tank, and it evaporates quickly so dilution is not an issue.
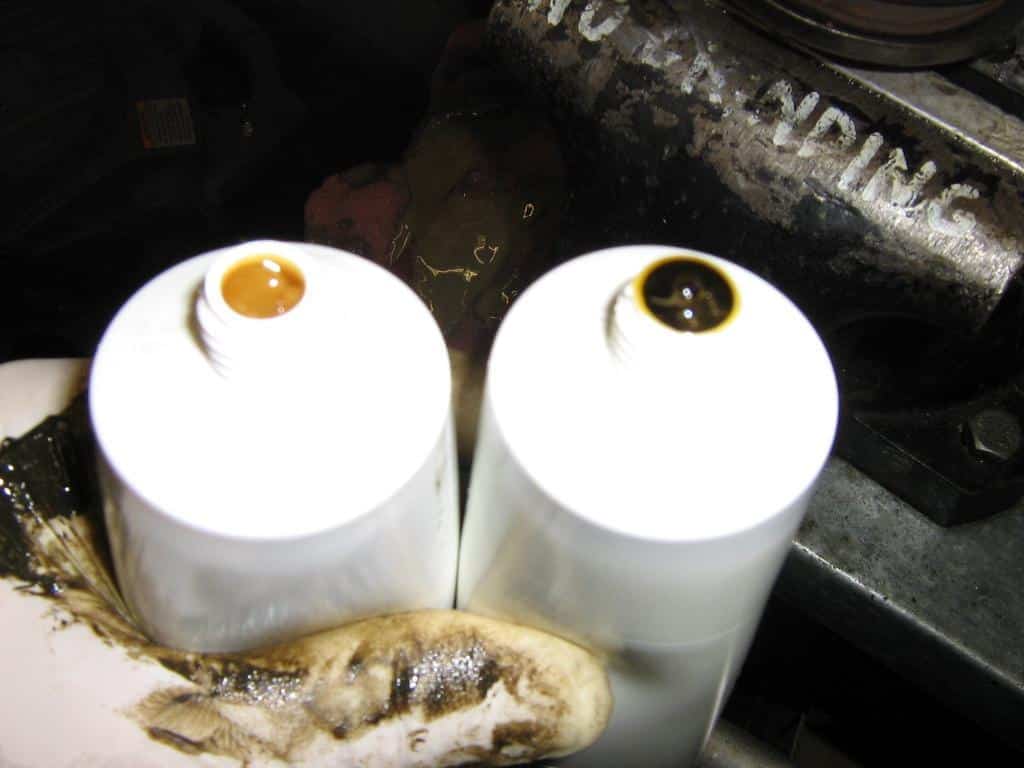
What kind of CV joint grease
Here’s something you won’t get with aftermarket CV boot kits: Toyota uses different types of grease for the inner and outer CV joints. Presumably the engineers had a reason for this, so we like to use the grease they specified. When we buy the kits from a Toyota dealer, all of the parts — the boots, clamps, clips, and even the grease the car had when it was new for a complete CV boot repair job.
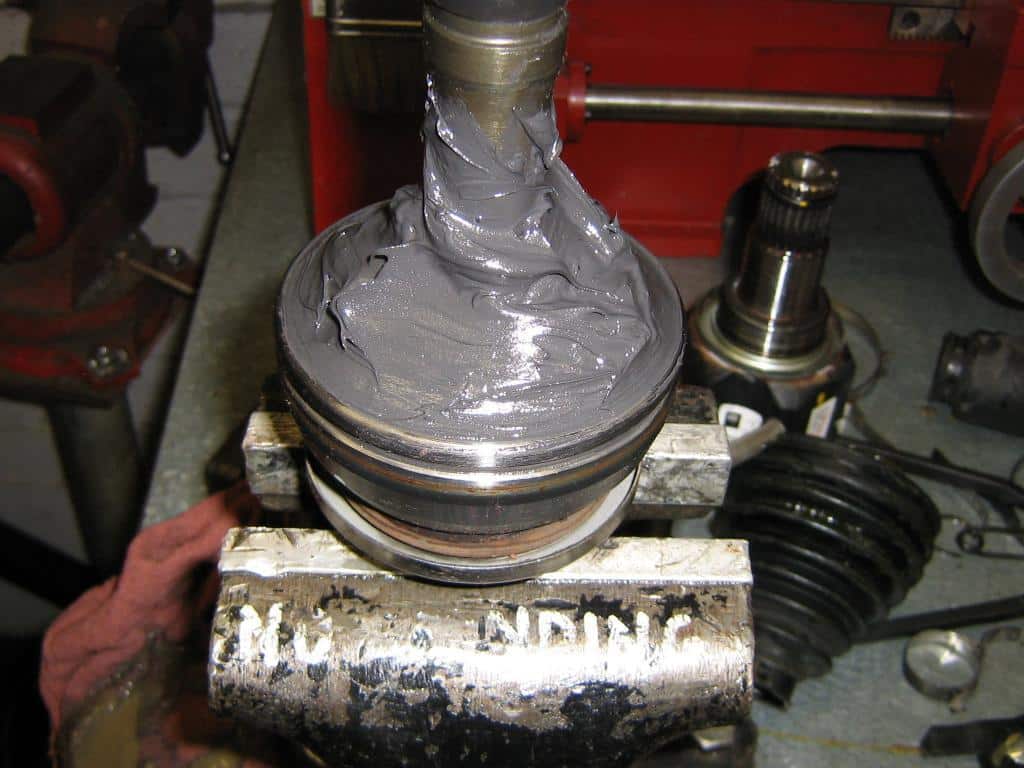
How to pack a CV joint
The joint should be “packed” with grease, meaning the grease should be pushed deep into the joint, not just smeared on top. This is accomplished by “slapping” the grease into the joint by hand to push it past the ball bearings. It’s a very messy job. Once the joint is packed, the remaining grease is piled in a mount atop the joint.
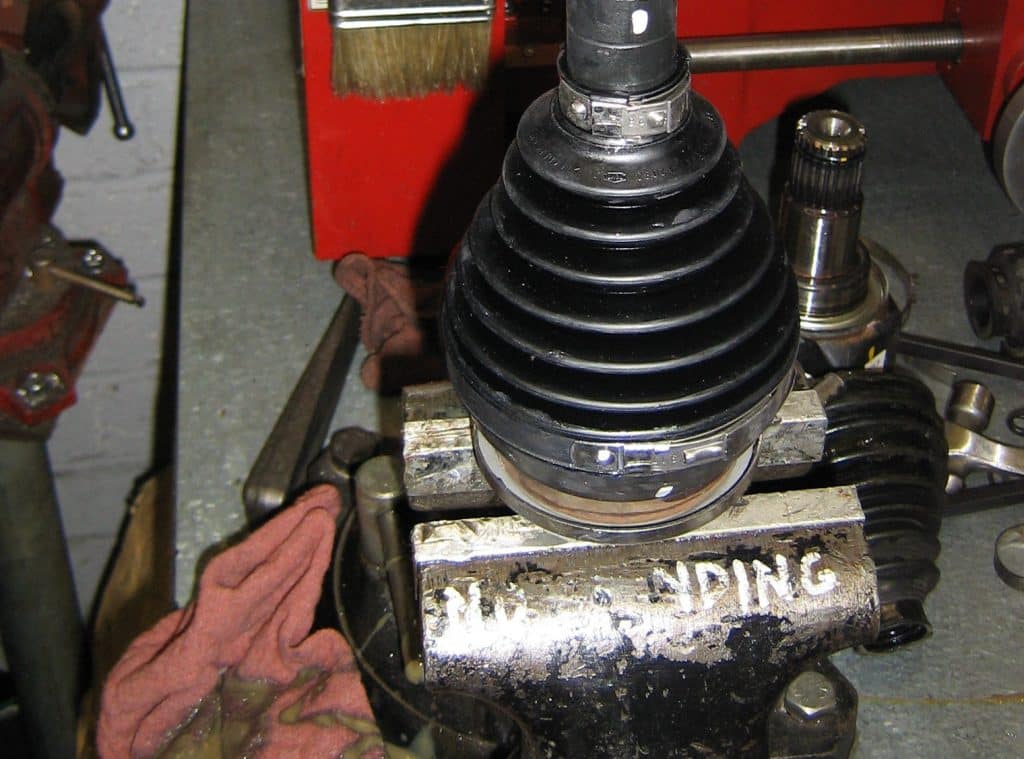
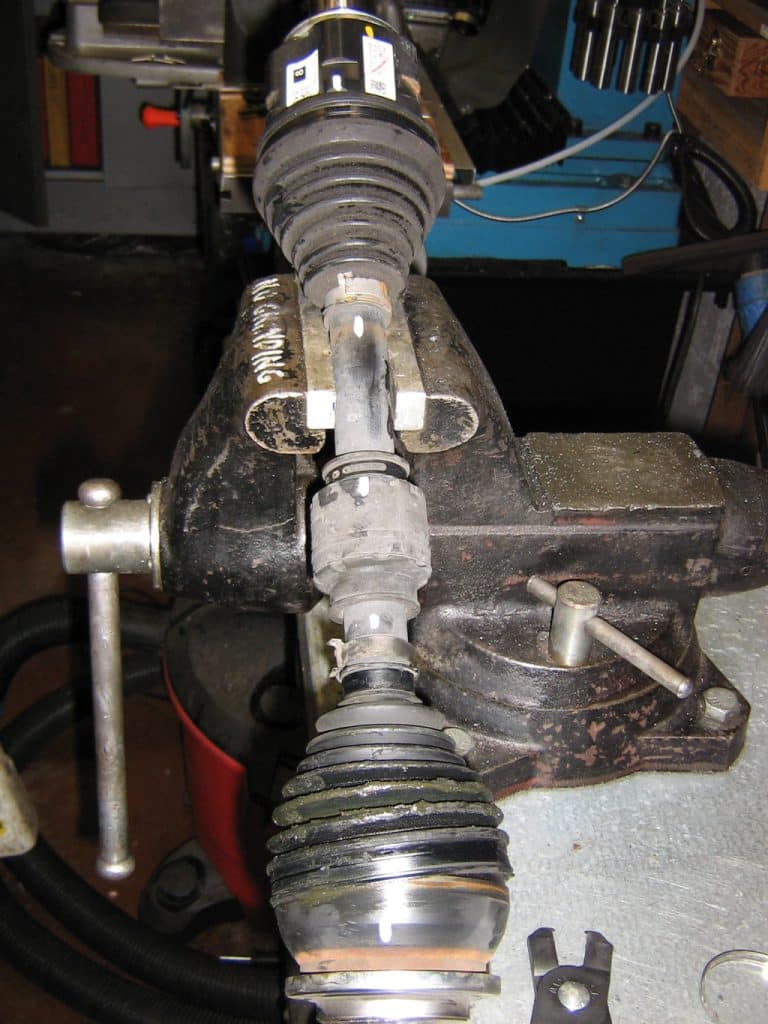
CV joint boot clamp
For some CV boots we use a special tool to tighten the CV boot clamp and then cinch and stake it so it won’t move. This Toyota CV boot clamp is made to be the exact size necessary to clamp the boot securely. It requires a special set of pliers to install or remove.
You may have noticed that we use aluminum vice jaws. This is because we’re holding the axle on the splined surface and don’t want to damage it. No point in doing a CV boot repair only to damage the axle while doing it.
Almost done with the CV boot repair
The inner CV boot is positioned on the axle shaft first. Then the joint is packed with grease and pushed onto the inner tripod. Once the joint is in position, the boot is slid onto the joint and clamped in place.
Here’s the axle after the completed CV boot repair — ready for installation and years of continued service.