There are a lot of different versions of similar looking microscope. Some of this will apply to all microscopes. Some may not apply to yours. I’m by no means an expert, but I did struggle through the setup, and it worked out well, so I thought I’d share, since I had trouble finding this information on the web.
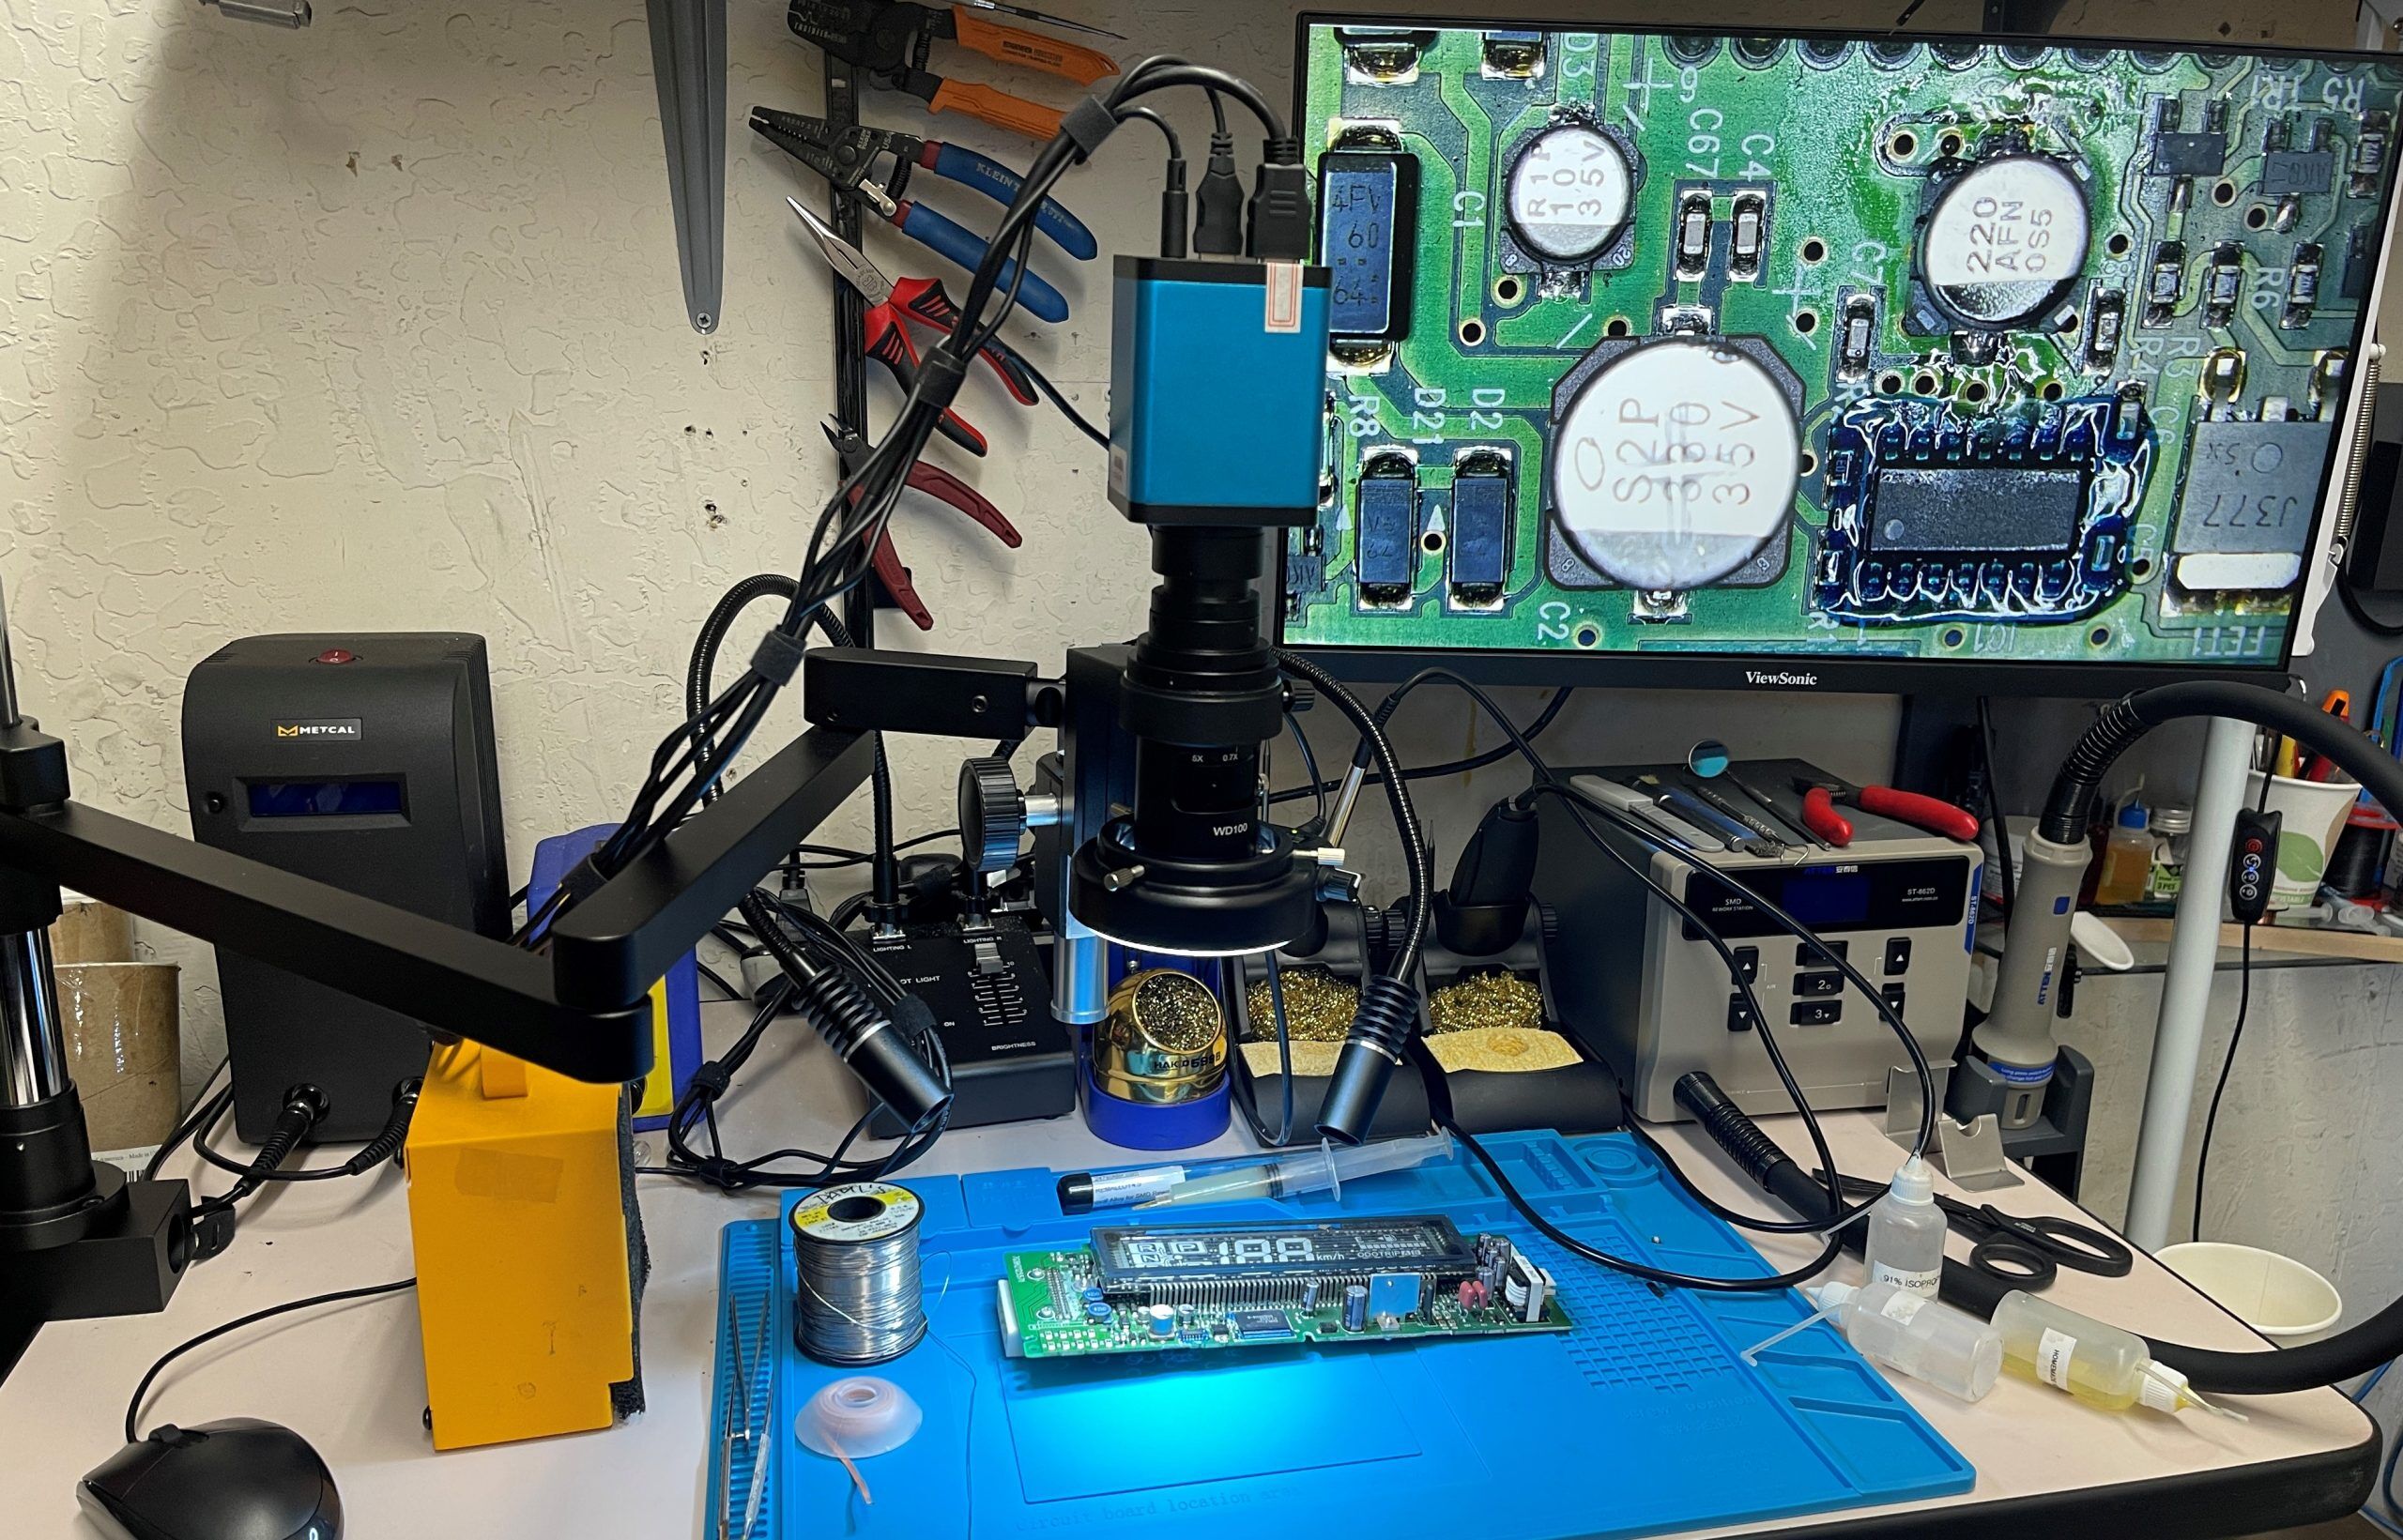
I have an Eakins AFSCOPE C212 autofocus microscope with a Sony IMX307, but I’ve seen microscopes with the same specs from Amscope and others. There were a few things that confused me at first.
- Which lens should I use?
- How far should it be from the table?
- How do I open the menu?
- Great. I got the menu open. How do it close it?
Which Lens should you use?
It came with the following lenses which can be screwed onto the end of the lens assembly:
- 0.35x
- 0.5x
- 0.75x
- 1.0x
- 2.0x
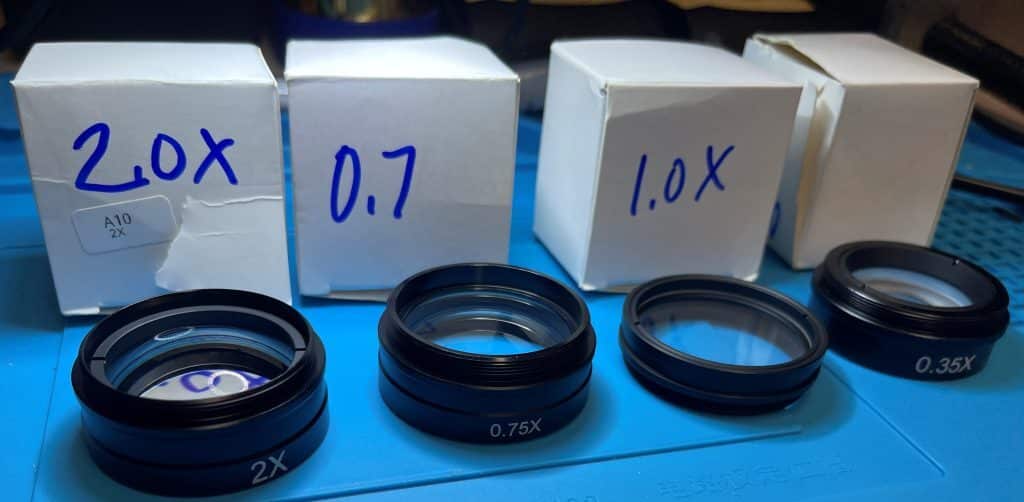
Each lens is a trade-off. I use it for soldering tiny stuff. If that’s what you’re going to use it for, you’ll likely want to use the 0.35x or 0.5x. Why? The “smaller” the lens, the more focal range you have (and honestly, I’m not 100% sure I’ve used the right word. I don’t really have any experience with photography or lenses in general), but here’s what I mean.
Let’s say you’re looking at a board with an electrolytic capacitor sticking up. If you’re using the 0.35x lens, you might be able to see an SMD component low on the board as well as the top of the capacitor in good focus at the same time. If you’re using the 0.5x, maybe you won’t be able to. Using the 2.0x? Good luck. You might not be able to focus on the top and bottom of a tiny SMD resistor at the same time.
How far should the lens be from the table?
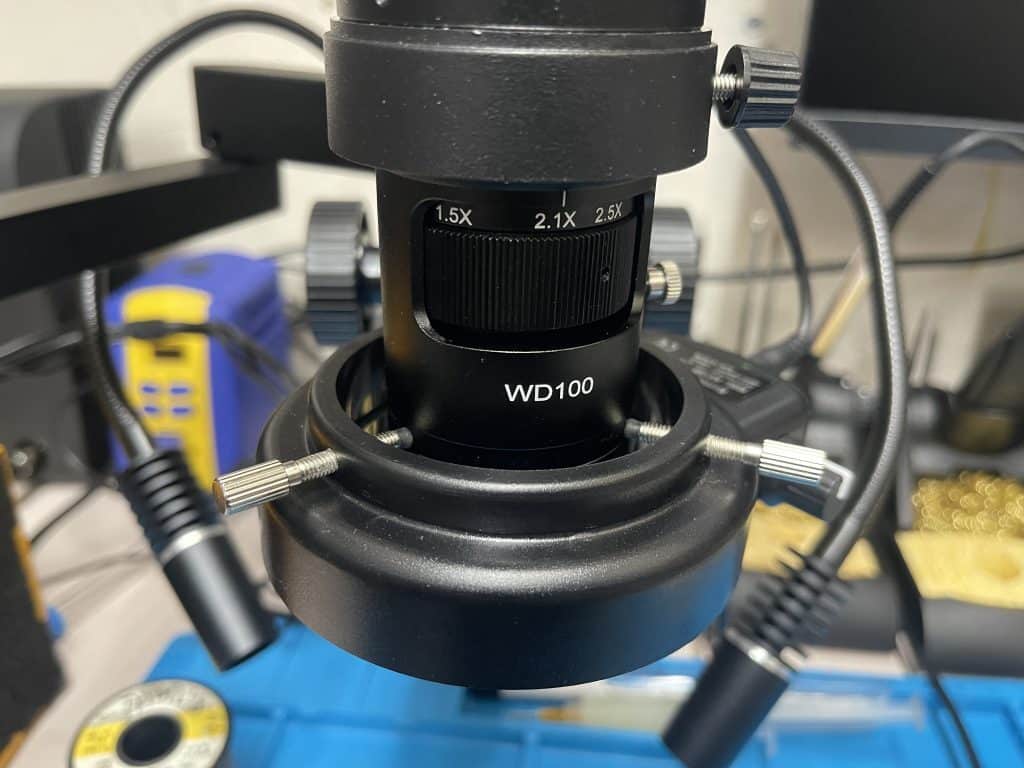
This depends heavily on which lens you choose. Each lens has a range of distances it will work at. This changes with each setting on the zoom dial. My zoom magnification goes from 0.7x to 5.0x. The focal range for all of the lenses is greatest at 0.7x zoom. When using 5X zoom, the autofocus will only work in a very small window of distances. You should test this with a business card with each lens at the minimum and maximum zoom. Here are my results.
0.35 LENS
0.7 zoom: 50mm – 300mm
5.0 zoom: 400mm only
0.5 LENS
0.7 zoom: 50mm – 240mm
5.0 zoom: 170mm only
0.7 lens
0.7 zoom: 80mm – 140mm
5.0 zoom: 120mm only
0.35 lens
So, to use the 0.35 and have it work at 5x zoom, you’d need to mount the lens somewhere in the middle of the 50 – 350mm range, then move the work off the table to use 5x zoom at 400mm. This didn’t work out so great for me though. The microscope is very sensitive to movement at the height and the image gets distorted and wiggles and getting it to focus at 5x while holding a part off the table is difficult. Using the 0.35 lens and only turning up the magnification to 2.0 works OK though and you can have stuff with different heights in good focus, so for soldering, this might be the best setup.
0.5 LENS
This is I decided to use. I set the microscope 170mm from the table (with the height adjustment in the center) so it would focus at 5x zoom. With the height adjustment all the way up, I can focus on an object that is as high at 165mm or as low as a sheet of paper on the table with the zoom at 1.0x.
Menu Madness
First, connect the mouse to the microscope before turning it on or you won’t be able to use the mouse. My instruction manual has a small amount of information on how to use the menu but leaves out a couple of essential bits of information. How do you get the menu to appear, and once it does, how do you get it to go away? I couldn’t find the information on Ali Express, Amscope, or anywhere else, and it was frustrating. I very much wanted to have the image on the screen move in the same way as I moved it on the table, but by default that’s not how it’s set up. (Select the “flip” and “mirror” options if you’d like the screen image to move in a logical way, if not it will be like doing everything while watching in in a mirror).
To open the menu, move the mouse pointer to the upper left corner. Very easy if you know what to do.
To close the menu, move the mouse from the edge of left side of the screen as if swiping the menu closed. Sometime that would work and other times it wouldn’t. More frustration. I eventually found that to close the menu, the lock on the upper right of the menu must be in the “unlocked” position.
Conclusion
I really like this digital microscope. With the auto focus and the right lens and zoom level, I can work on a flat board, or a board still mounted in a device that’s sitting 165mm above the table, all without doing any manual focusing. I was worried I might lose something when going from a stereo microscope to a flat image, but I don’t really notice any difference, other than gaining the convenience of not constantly refocusing and the comfort of sitting upright.
I suspect you’ll be able to figure out all of the subjects I didn’t cover pretty easily on your own. Good luck, and hope this helped.