At Art’s Automotive Berkele we like fixing parts instead of buying new. Sometimes we use plastic welding or other plastic repair methods to fix plastic parts because they’re no longer available. Other times we repair plastic parts because they’re ridiculously expensive to purchase. This is a service that very few general repair shops offer, but it is fairly common at body repair shops. Anyway, we enjoy fixing things that were never meant to be fixed, and it’s a win-win for us and our customers. We can make a good profit, and our customers get a repair that might not have been possible or was overly expensive done at a reasonable price.

Plastic Welding In Berkeley
Plastic welding is an excellent way to repair damaged plastic parts and can be employed to save money or repair a part that is no longer available. It’s *real* welding. It’s not like epoxy, crazy glue, or a hot glue gun. Plastic filler rod and the base material are melted together and permanently fused.
I use a hot air torch to heat the parts until they melt (about 450 degrees, depending on the type of plastic). I use plastic filler rod made from the same type of plastic to join parts or build up missing pieces. The repaired parts are 90% as strong as the original part, if machined to the original dimensions, or potentially stronger if the part is built up or reinforced.
Not all things that look like plastic are plastic though. Fiberglass, Bakolite, some glass impregnated nylons, and some blends are un-weldable. I sometimes a product called Fiber Flex to braze some non-weldable plastic or plastic-like parts. However, a brazed part will not be as strong as a welded part.
Note from the future. This is an old article as evidenced by the grainy low resolution images. We still do plastic welding, but there are also some newer methods of repairing plastic parts that we use as well.
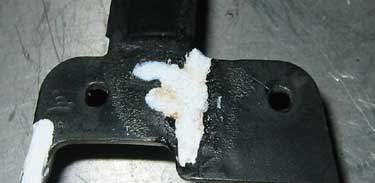
Unobtainable parts can be worth fixing
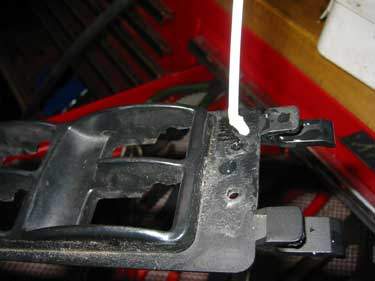
This is a driver’s door master switch bezel that has been discontinued.
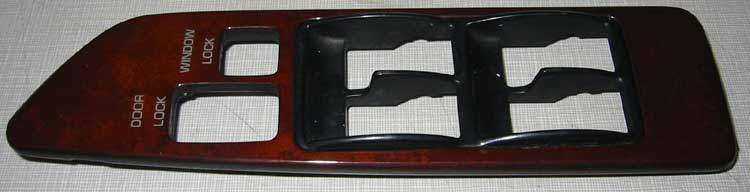
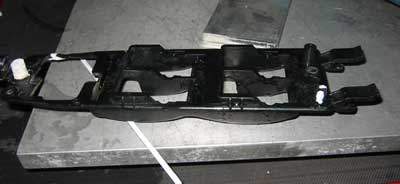
Toyota window switch keeps falling into the door
This is a broken plastic lug on the underside of the cover that holds the switch to the cover. Without the lug, the switch falls into the door panel
You can only weld like types of plastic (and there are a lot of different types).
Different plastics can’t be welded together. Here are a few types of plastics: PE, PP, ABS, PVC, HDPE, and Nylon. That’s far from an all-inclusive list though. The easiest way is to find a mark or recycling symbol on the part. If there is no mark, attempt to weld each type of rod to the part until one type sticks and won’t pull off. This part is ABS.
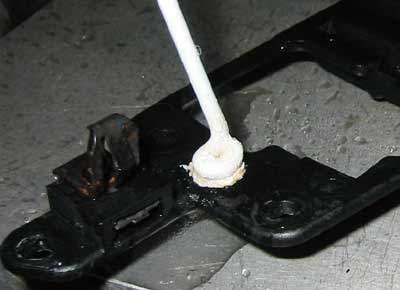
Prep the area to be welded by grinding away the old plastic
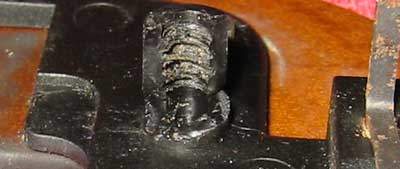
Next, I grind down the remaining part of the lug with a wide flute carbide die grinder bit, leaving a flat surface. Once I prep the surface, I add plastic filler in small coils, cooling the plastic with water after each coil. This solidifies the plastic already deposited, making it easier to build on.
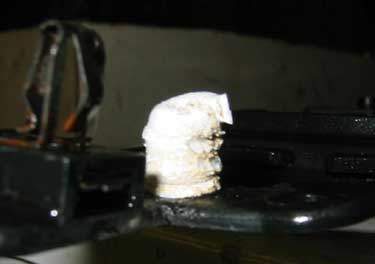
Build up the broken part
We’ve build the rough shape of the lug.
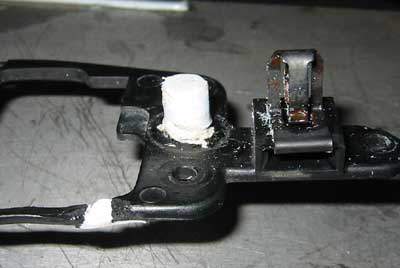
Reshape the weld build-up
With some careful die grinding, we’ve returned the lug is to its original size.
Repair cracked areas
There was also a crack underneath the lug. We ground that out, just as we would when welding metal, and then filled the v-groove with weld. On this job I ground extra deep to reach the center of the lug on the other side because I wanted to make sure the lug is well attached.
Repair complete
Now that we have repaired all the cracks and damage and drilled and tapped screw holes to mount it to the switch, the part is ready for re-assembly.
Reassembled and ready for installation onto the window master switch
Now that we have repaired all the cracks and damage, we drill and tap new screw holes. The part is ready for re-assembly.
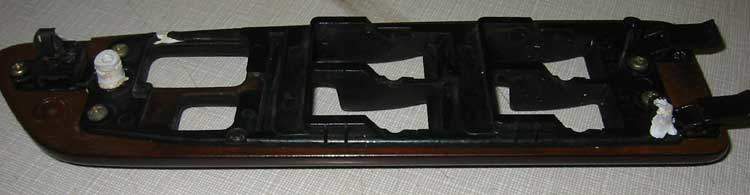
Here’s the part all repaired. Since all of the damage was in non-visible areas, it looks as good as new.
Plastic Part Repair in Berkeley
This is an example of repairing a plastic part because it’s way too expensive.
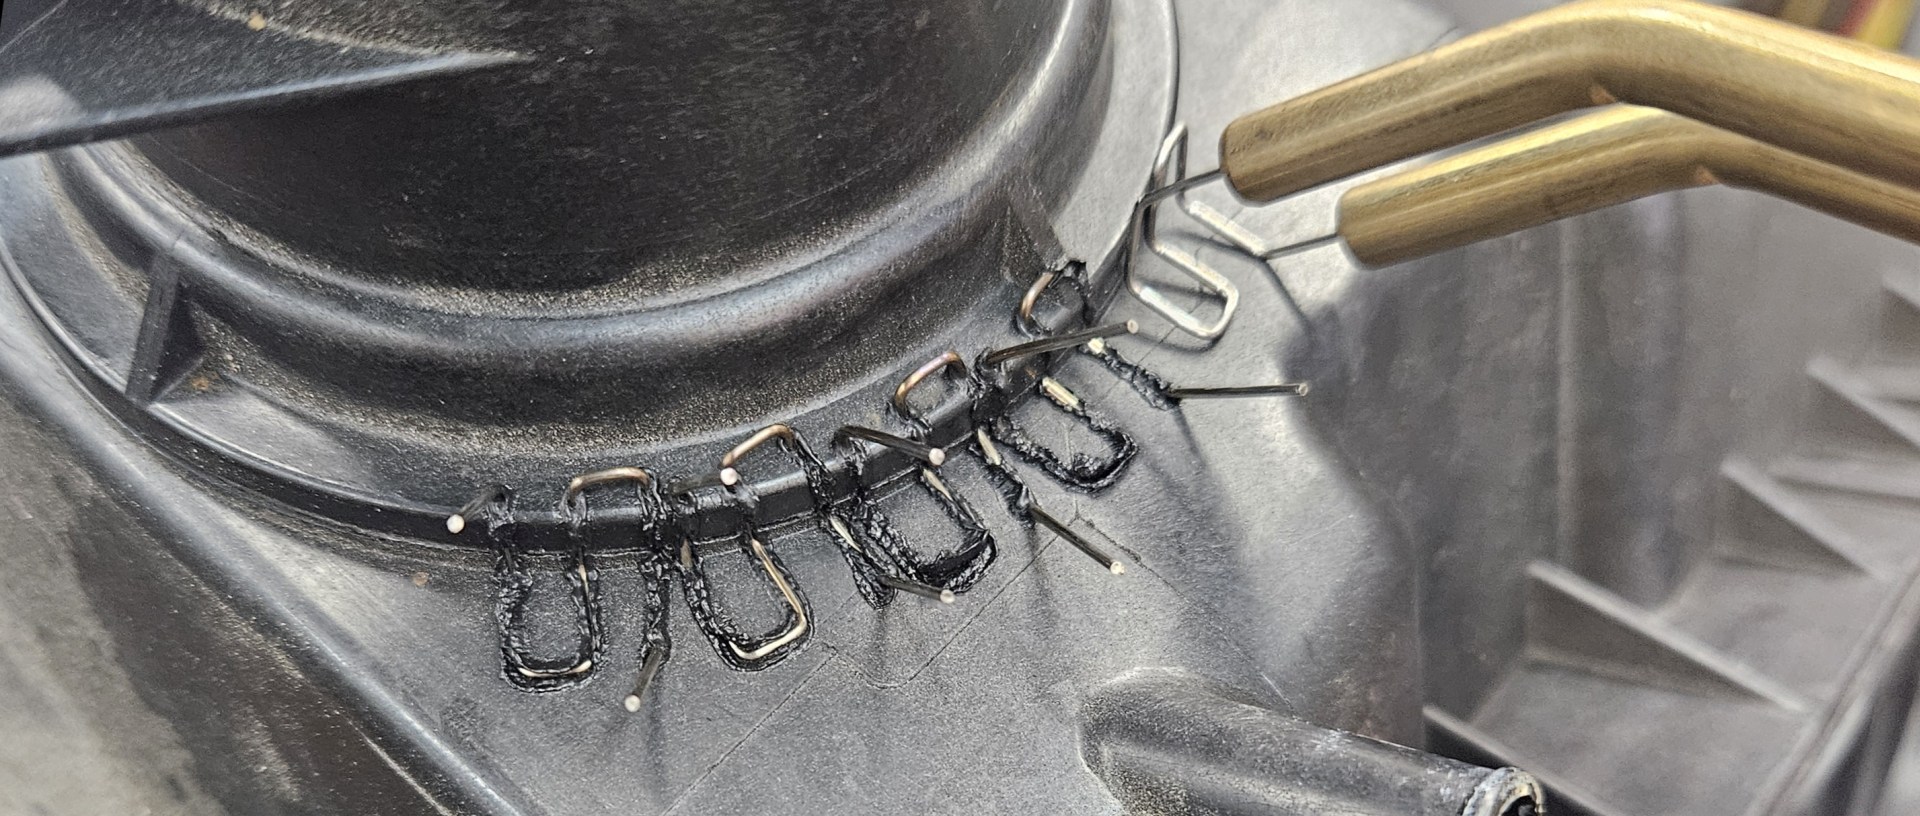
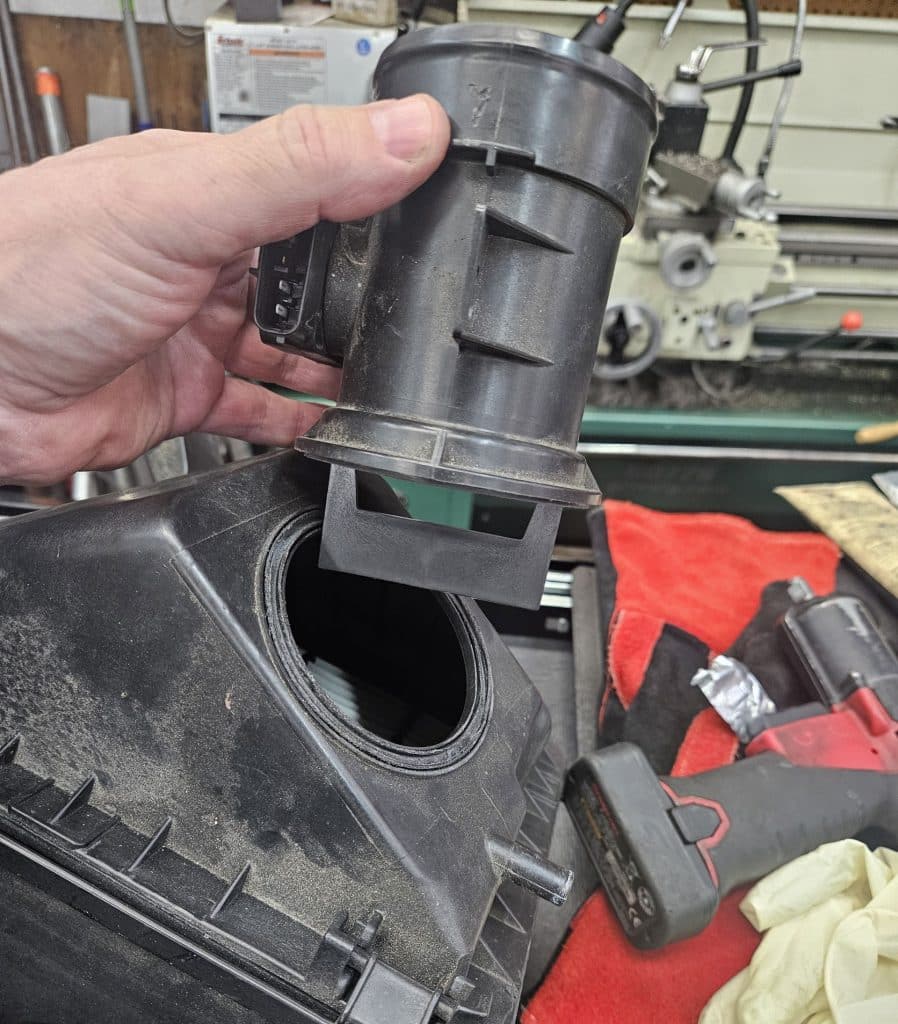
These older Toyota Tacoma air cleaner housings are not one of Toyota’s best designs. We frequently find the tube section floating at the end of the air intake boot. This should be a part that costs about $60 bucks, but it isn’t; it’s 10 times that much. Toyota wants a whopping $622 for this part. You might think you’d get a MAF sensor along with it at this price, but you’d be wrong. It’s just a new chunk of plastic, just as poorly designed as the one you’re replacing.
The 1998 to 2004 Tacoma is a little too old for our shop at this point, so this isn’t the repair will be doing for many people, just existing customers.
However, I figured it might help to post how I repair these so that other people with the same problem (and I’m sure there are many) can fix it without spending a fortune at a Toyota dealership.
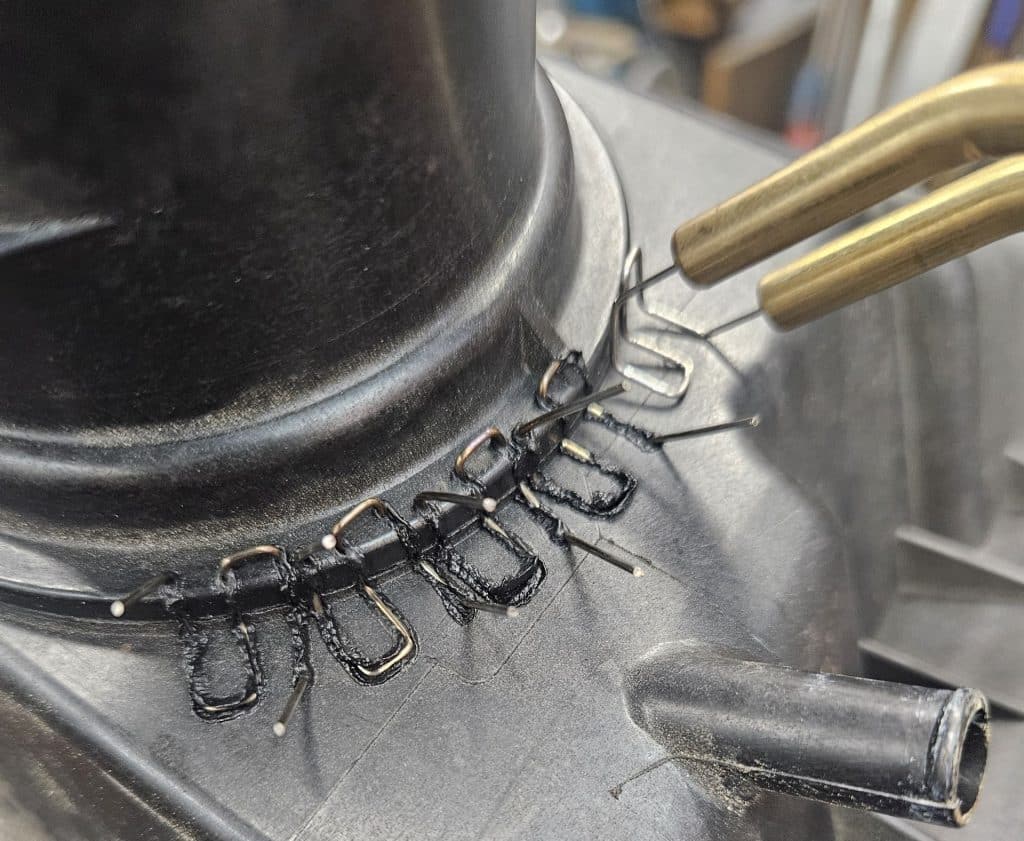
Way better than buying a replacement housing
This is a really great way to repair plastic. We also do plastic welding and a couple other types of plastic repair, but this method is by far the strongest and fastest. Its only downside is that you either need to be able to place the hot staples in an area that’s not visible, or, as in this case, on a part where it doesn’t matter how it looks

The staples come in a wide variety of shapes to work with nearly any project, and you can always bend them into a different shape if you need to .
Once I’m done adding staples I’ll cut all the ends flush. However, they’ll still be sharp so I’ll either grind or cover the cut ends.
Better than a new air cleaner housing
Once complete, the repaired part is much stronger than the original part and will be able to survive the air boot tugging on it every time the engine shifts with acceleration and deceleration.
I was holding the camera with one hand so the shaking wasn’t as vigorous as it could have been, but trust me; it’s super strong. The filter housing has a fair amount of mass but I’m not at all worried about the repair failing.
Prior to developing this method, we had tried super glue and epoxy, both of which were much weaker than the original part (which was already pretty weak).
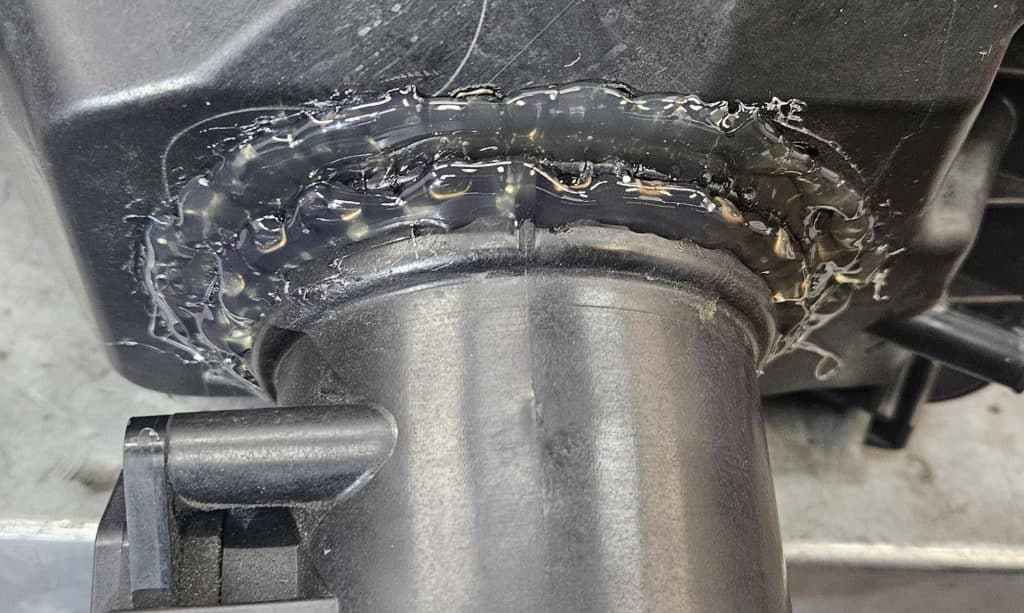
I add a couple of beads of hot glue as a final step. I do this for a couple of reasons. First, I don’t want any unfiltered air to seep past the repair. The staples are strong, but they don’t seal.
The second reason is to make the part safe for the next guy. The cut ends of the staples are sharp and can cut you if you’re not careful.
If you don’t have a hot glue gun you can use silicone sealer, Shoe Goo, or whatever you have on hand.

An Inexpensive Fix
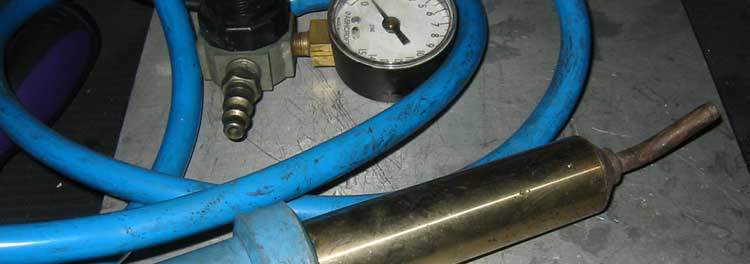
If you have a Tacoma with a broken air cleaner housing and would like to give this a shot, you can pick up the hot staple tool from Amazon, AliExpress, or eBay for about 20 bucks, including the staples. That’s about $600 cheaper than buying the part and at the end of it you have a pretty cool tool you can use to repair other stuff.