We’ve been repairing hybrids for a long time now, and this high voltage isolation testing article is a pretty old. That said, while the self-diagnostic capabilities have improved over the last 24 years, the manual testing is pretty much the same, so this information is still valid.
P3009 DOESN’T HAVE A INF CODE FOR LOCATION
A P3009 on a Gen1 Prius is a bit different than a P0AA6 on later Toyota hybrids in a couple ways. First, the P3009 does not have a sub-code to identify the area of the fault. When a P3009 sets, there could be an isolation fault anywhere: the inverter, the DC frame cables, the MG2, the MG1, or inside the battery case. All testing must be performed manually. Second, when a P3009 sets, it will not prevent the customer from continuing to drive the car. If a Gen2 sets a P0AA6 (the equivalent of a P3009), once the driver turns the car off, it will not start again until the code is cleared.
APPLY HIGH VOLTAGE TO EACH COMPONENT SEQUENTIALLY
P3009 diagnosis can be broken into two sections: observation and application of logic, and then testing with an insulation test meter, also known as a “megger” or megohmmeter.
Step one is to copy all the freeze frame data and then clear codes. Once the codes are cleared, energize sections one an a time to find the area of the leak. This will save time because you’ll have less to check with the megger. You must wait a few minutes after energizing a section because the code will take a while to set.
5 minutes or more KOEO
Turn the key to the ON position. Did the P3009 reset? If so, the leak is in the battery. Why? Because the system main relays are open and the only place high voltage is present is in the battery case. The battery case houses the HV battery ECU, the SMRs, a few cables, and the battery pack. If any of these are in contact with chassis ground, a P3009 will set. If the P3009 does not set with the key ON and engine off, the leak is either intermittent or elsewhere.
5 minutes or more KOER in neutral
READY the car and quickly shift to neutral. Now the DC frame cables and inverter are powered up. If the code resets here, but didn’t with the KOEO, focus your efforts on the cables and inverter. Still no code? Move on to the next step.
5 minutes or more KOER in reverse
Put the car in reverse. At this point you’ve added the MG1 and MG2 to the energized components. Pretty straight forward huh?
USE A INSULATION TEST METER TO PINPOINT THE LOCATION OF THE LEAK
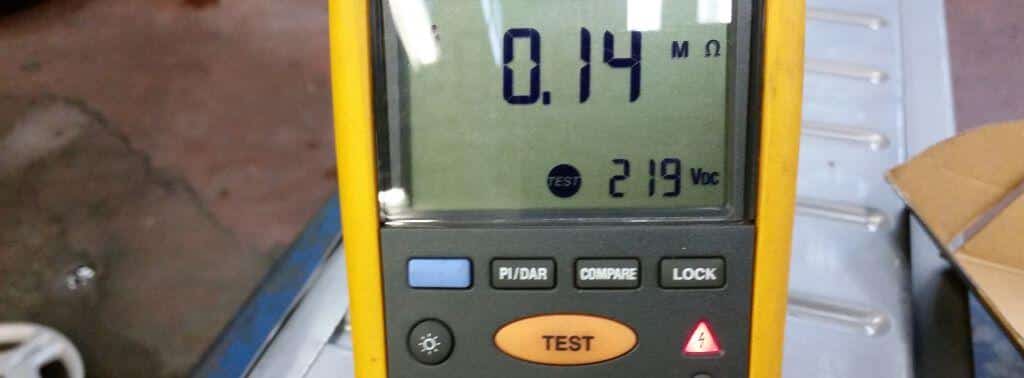
So, this car set the P3009 with the key on and READY off, so the leak is in the battery case. Next step? Remove the battery and check with a megger. Since this is a Gen1, it has the “plug to nowhere” which seemed like a great way to get inside the battery past the open SMRs. The meter reads 0.14 Mohm and that’s not enough, so we’ve confirmed our earlier test (or so it seemed). If you’re curious, a good battery will have over 550 Mohm resistance to ground.
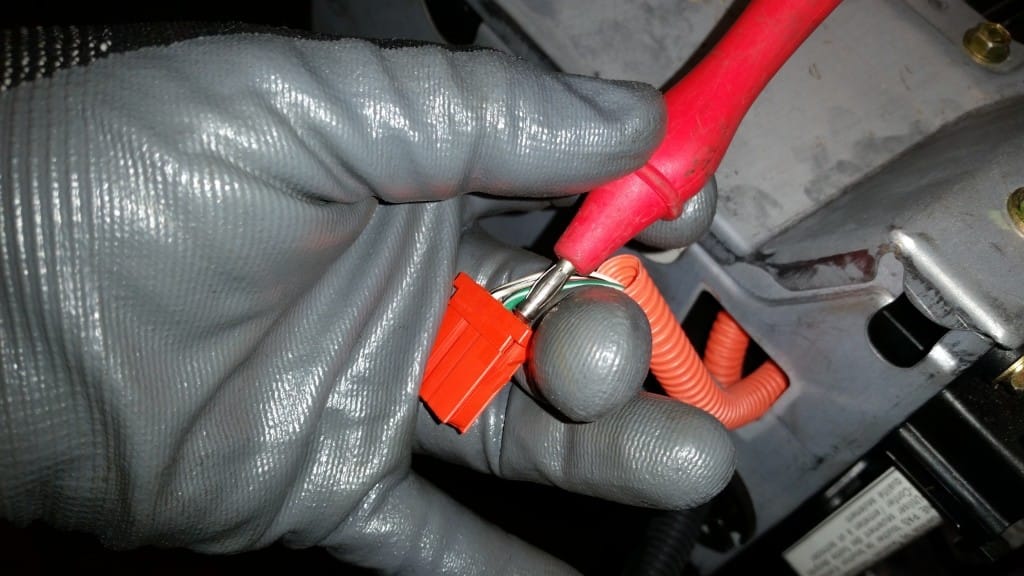
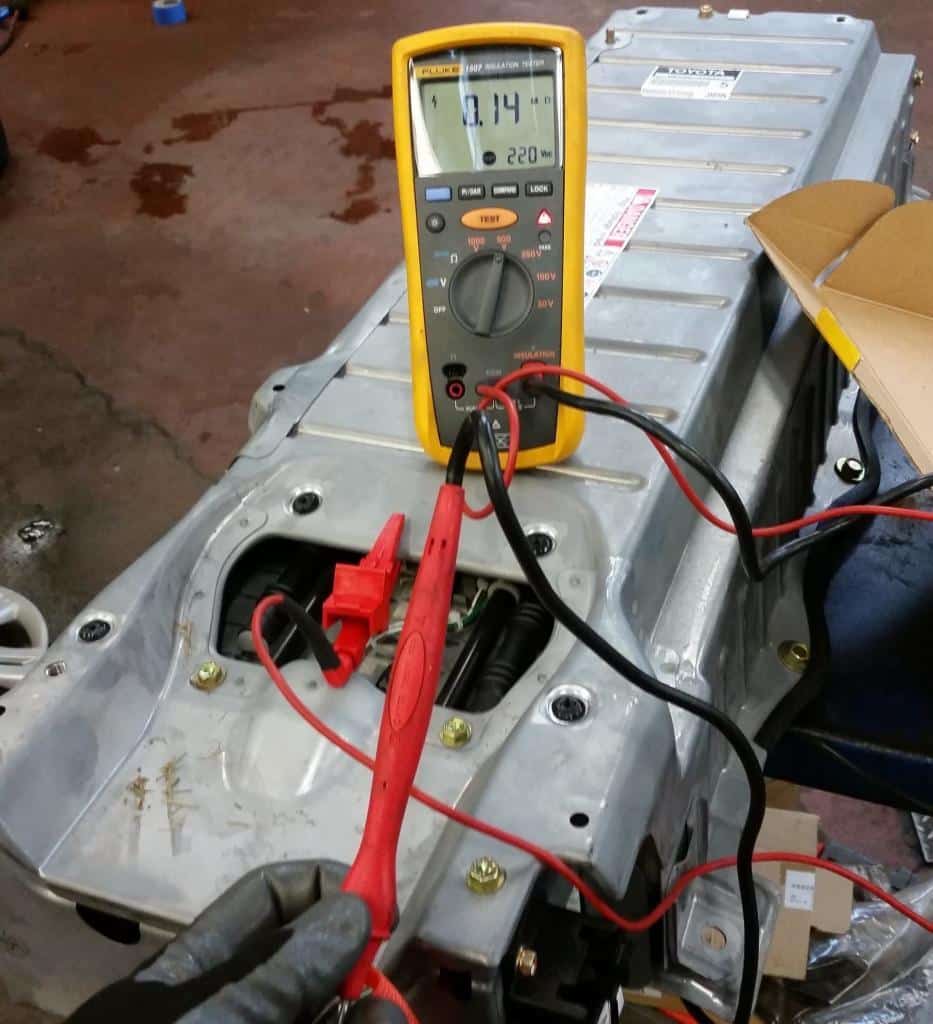
You must remove the hv battery ECu from the circuit prior to insulation testing
The next step in our high voltage loss of isolation testing is to remove the cover and disconnect the SMR cables, the HV battery ECU, and the cables to the service plug. I’m doing this to make sure that the leak to chassis ground is not in the ECU, SMRs, or cables. I checked again and found a somewhat higher reading, but still not good.
As it turns out, the HV battery ECU has 0.14Mohm resistance to ground, and that’s normal. So, if you want to condemn an HV battery, you’ll need to remove the HV Battery ECU from the circuit. If you want to condemn the HV Battery ECU, you’ll need to do so by eliminating everything else.
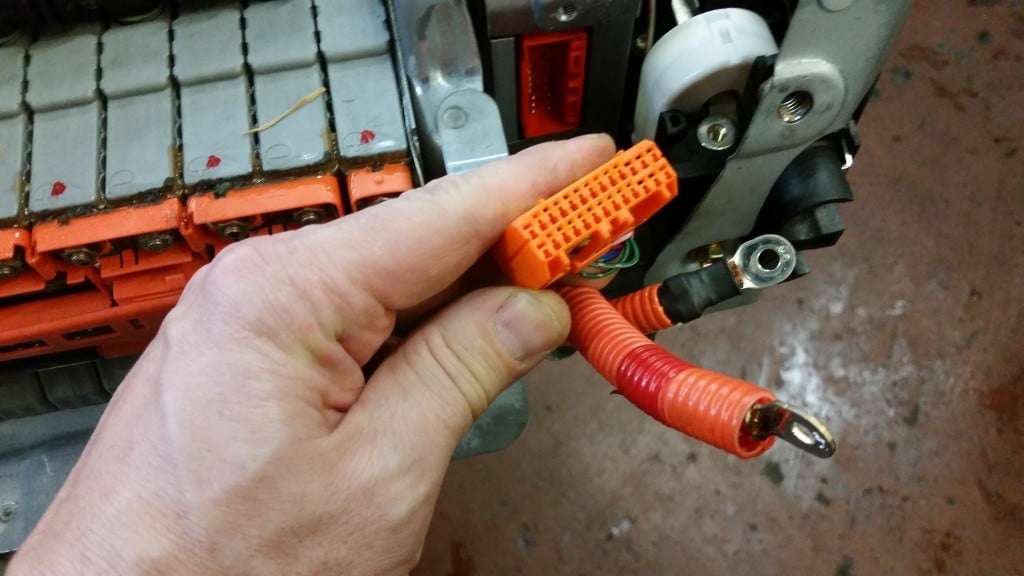
It’s important to know that the HV battery ECU connector has nearly full battery voltage at all the time, even when the service plug is out. There’s not much danger in handling it, just like there’s not much danger if you were to unplug your 220V clothes drier. But if you try start probing or cutting into wires you could end up with some bad burns or worse.
Electrolyte is a conductor. Who knew 😉
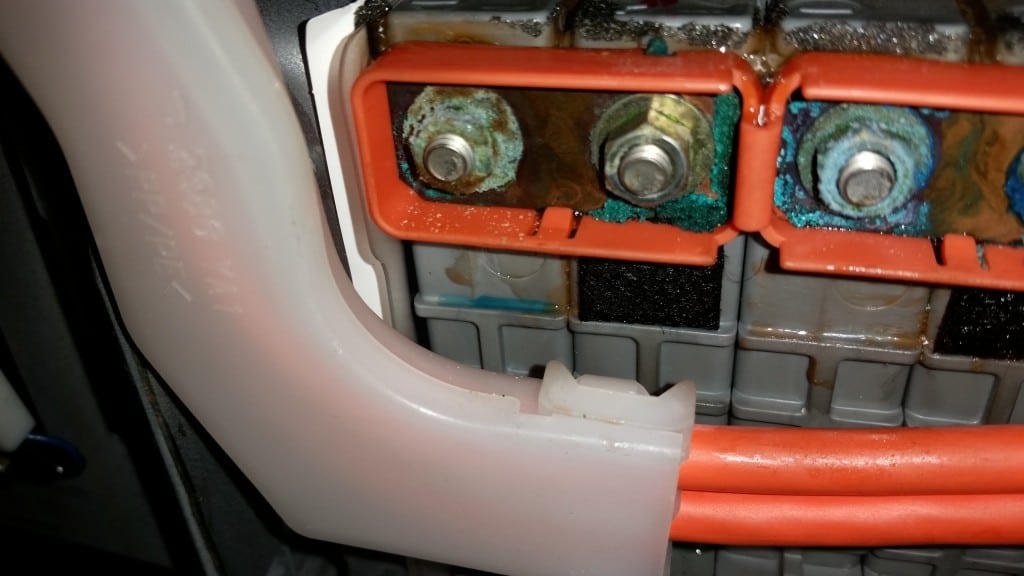
The reason the high voltage is shorting to ground is electrolyte leaking from the battery terminals. If you look below the terminal on the left, you may see a pool of electrolyte sitting on the ridge and a lot of corrosion on the terminals. This battery is wet all over and there’s no point in trying to clean it; it’s leaking too much.
High Voltage Isolation Testing Recap
Clear the codes.
Energize a section at a time until the code resets.
Check the section that is causing the code to set with a megger, noting that the HV battery ECU and inverter will have lower resistance than the windings and battery.
Other articles you may enjoy:
Water leak causes P0AA6 on a Lexus RX400h
Mouse pee shorts out a high voltage battery
P3009 article written by our friends across the bay, Luscious Garage
