Have you ever wondered what happens during a clutch replacement? Does a mechanic just unbolt the old one and bolt in replacement clutch? As it turns out, it’s a combination of several new parts and reconditioning other parts. If you’d like to know more, read on.
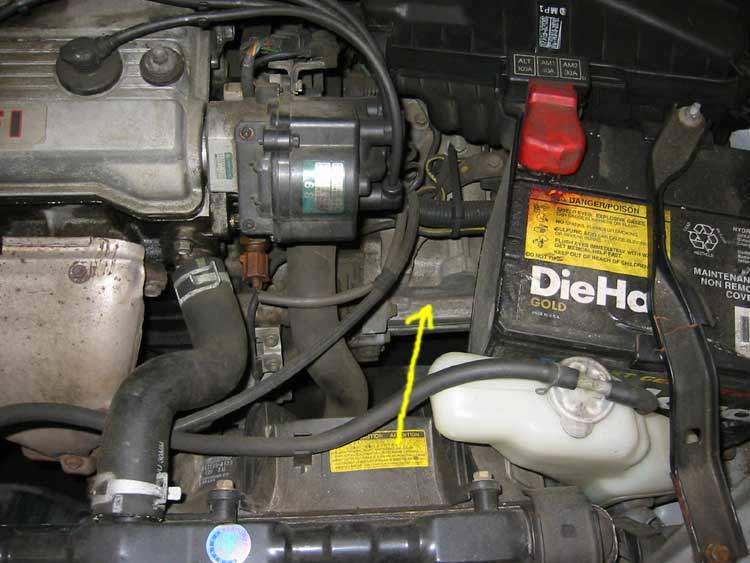
This is a picture of the transmission in the car before the work was started. The yellow arrow points to the top of the transmission. The transmission must come out to replace the clutch. As you can see, there is a lot of stuff blocking access to the transmission.
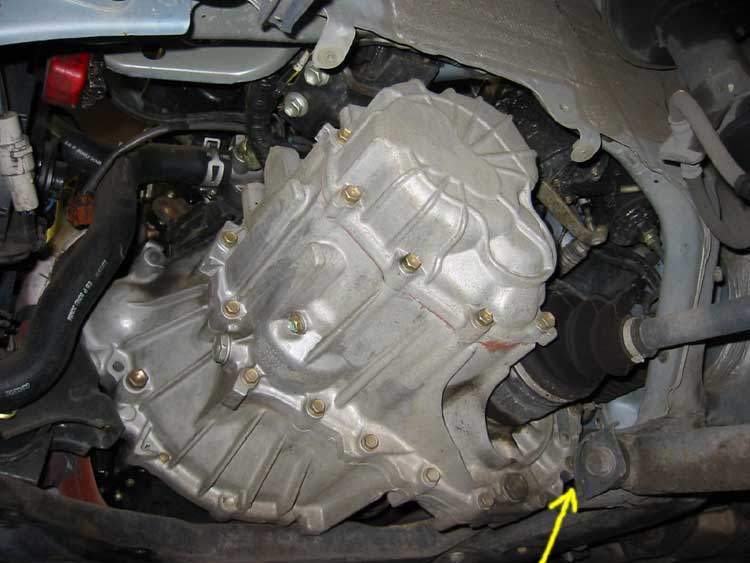
This next picture is the transmission viewed from under the car after the splash shield was removed. The yellow arrow is pointing to the lower control mount on the sub-frame. The transmission will not come out past this mount, so the sub-frame will need to be removed.
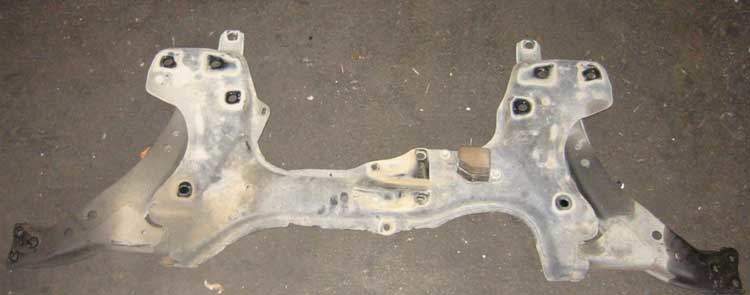
Here is the sub-frame removed from the car. It spans the front of the car, going all the way from the left wheel to the right wheel
What gets replaced during clutch repair?
What’s done during a clutch replacement varies from shop to shop, but here at Art’s we always perform a complete job. To us, complete means a new disc, pressure plate, clutch release bearing (AKA “throw out bearing”), and pilot bearing. We also re-machine the flywheel every time we do a clutch repair, which isn’t the practice at most shops, at least here in the East Bay. It probably goes without saying (but I’ll say it anyway) we replace the manual transmission oil whenever we replace a clutch.
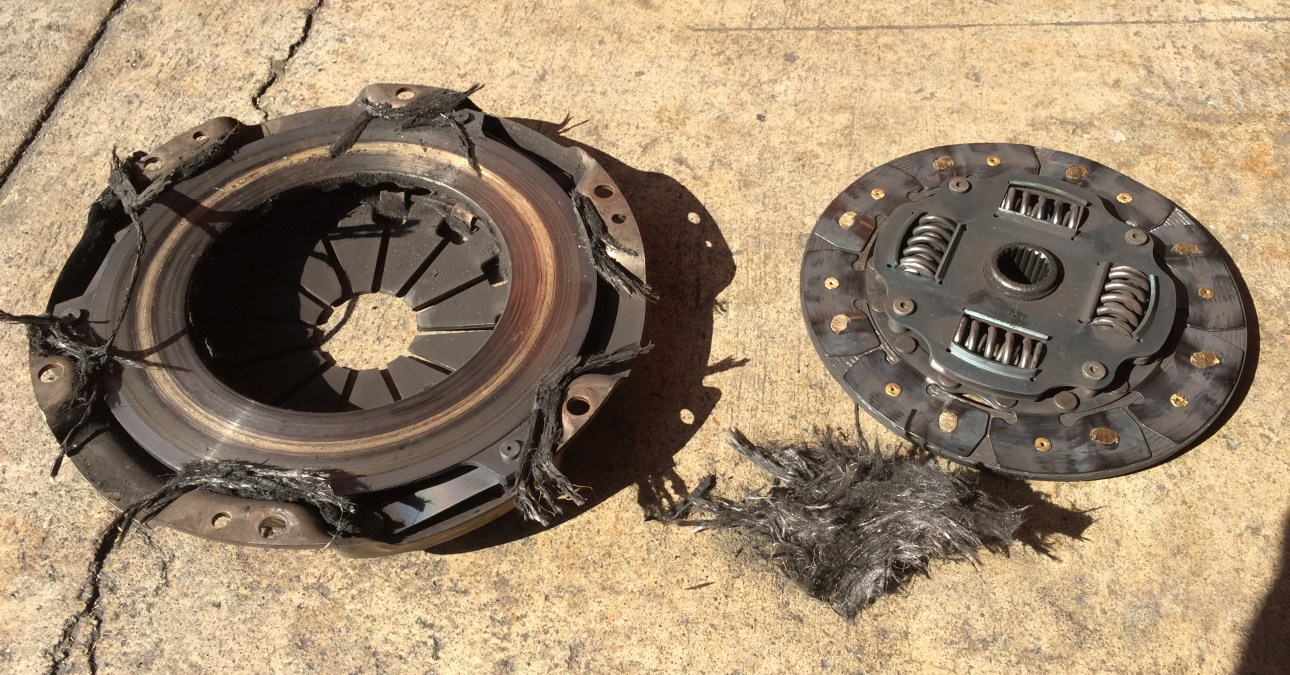
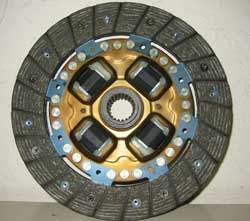
Clutch Disc
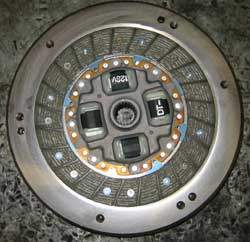
This is the clutch disc. It rides on the transmission input shaft. The clutch disc is squeezed between the pressure plate and flywheel to transfer power to the transmission. The clutch disc is always replaced during a clutch repair.
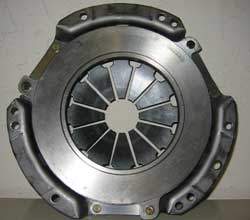
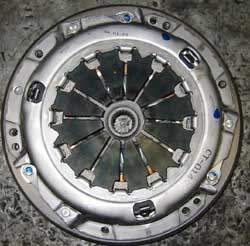
Pressure Plate
This is the pressure plate. It bolts to the flywheel, which bolts to the engine. It provides the pressure to squeeze the clutch disc and a friction surface.
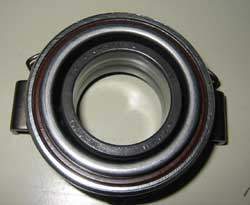
Release bearing
This is the clutch release bearing. Since the pressure plate is always spinning and the clutch release fork is stationary, the bearing is necessary absorb the spinning motion.
What gets reconditioned
The flywheel
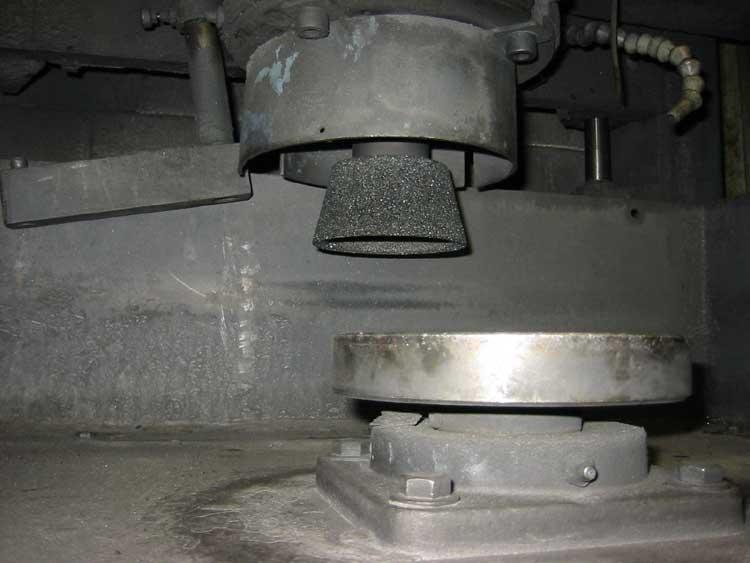
Below is the flywheel grinder. The flywheel is quite expensive, so we won’t replace it unless it’s absolutely necessary. The flywheel friction surface is every bit as important as the pressure plate surface, so it does not make sense to reinstall a worn part without repairing the surface. Most shops either do nothing to the flywheel or send it to a machine shop to be resurfaced. Art wisely realized that even though a flywheel grinder is an expensive piece of shop equipment, it will pay for itself fairly quickly. The cone is made from an abrasive material and spins very quickly. The flywheel is bolted to the table, which turns slowly, just like a turn table on a record player.
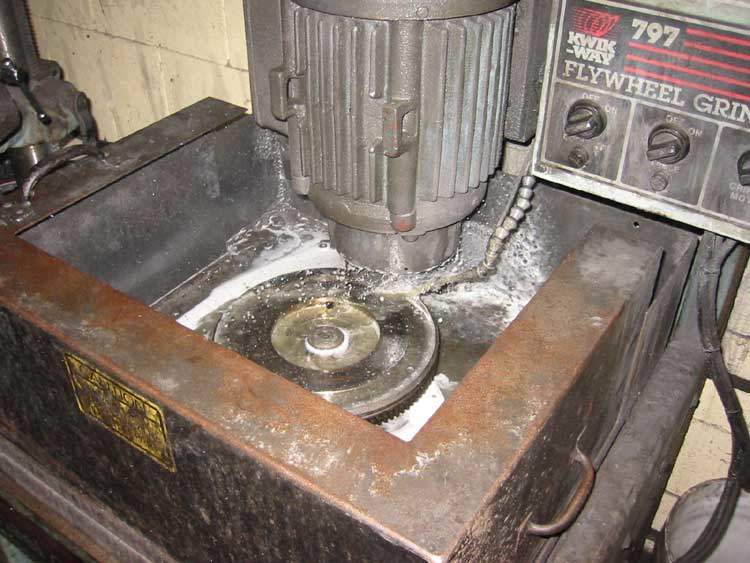
Here’s the flywheel grinder in action. Typically, a clutch flywheel will have two “steps”. One step is where the clutch disc contacts the flywheel and that’s the area that’s worn. This area is machined first to remove the wear. One resurfacing is complete, the second step, where the pressure plate mounts, is machined to restore the original relationship. If the step isn’t machined three things might happen:
- The two steps might be a little off in the axial plane
- If the distance between the pressure plate step and the disc step are less than original, the clutch may drag.
- If the distance between the pressure plate step and the disc step are more than original, the clutch may slip.
Resurfaced flywheel
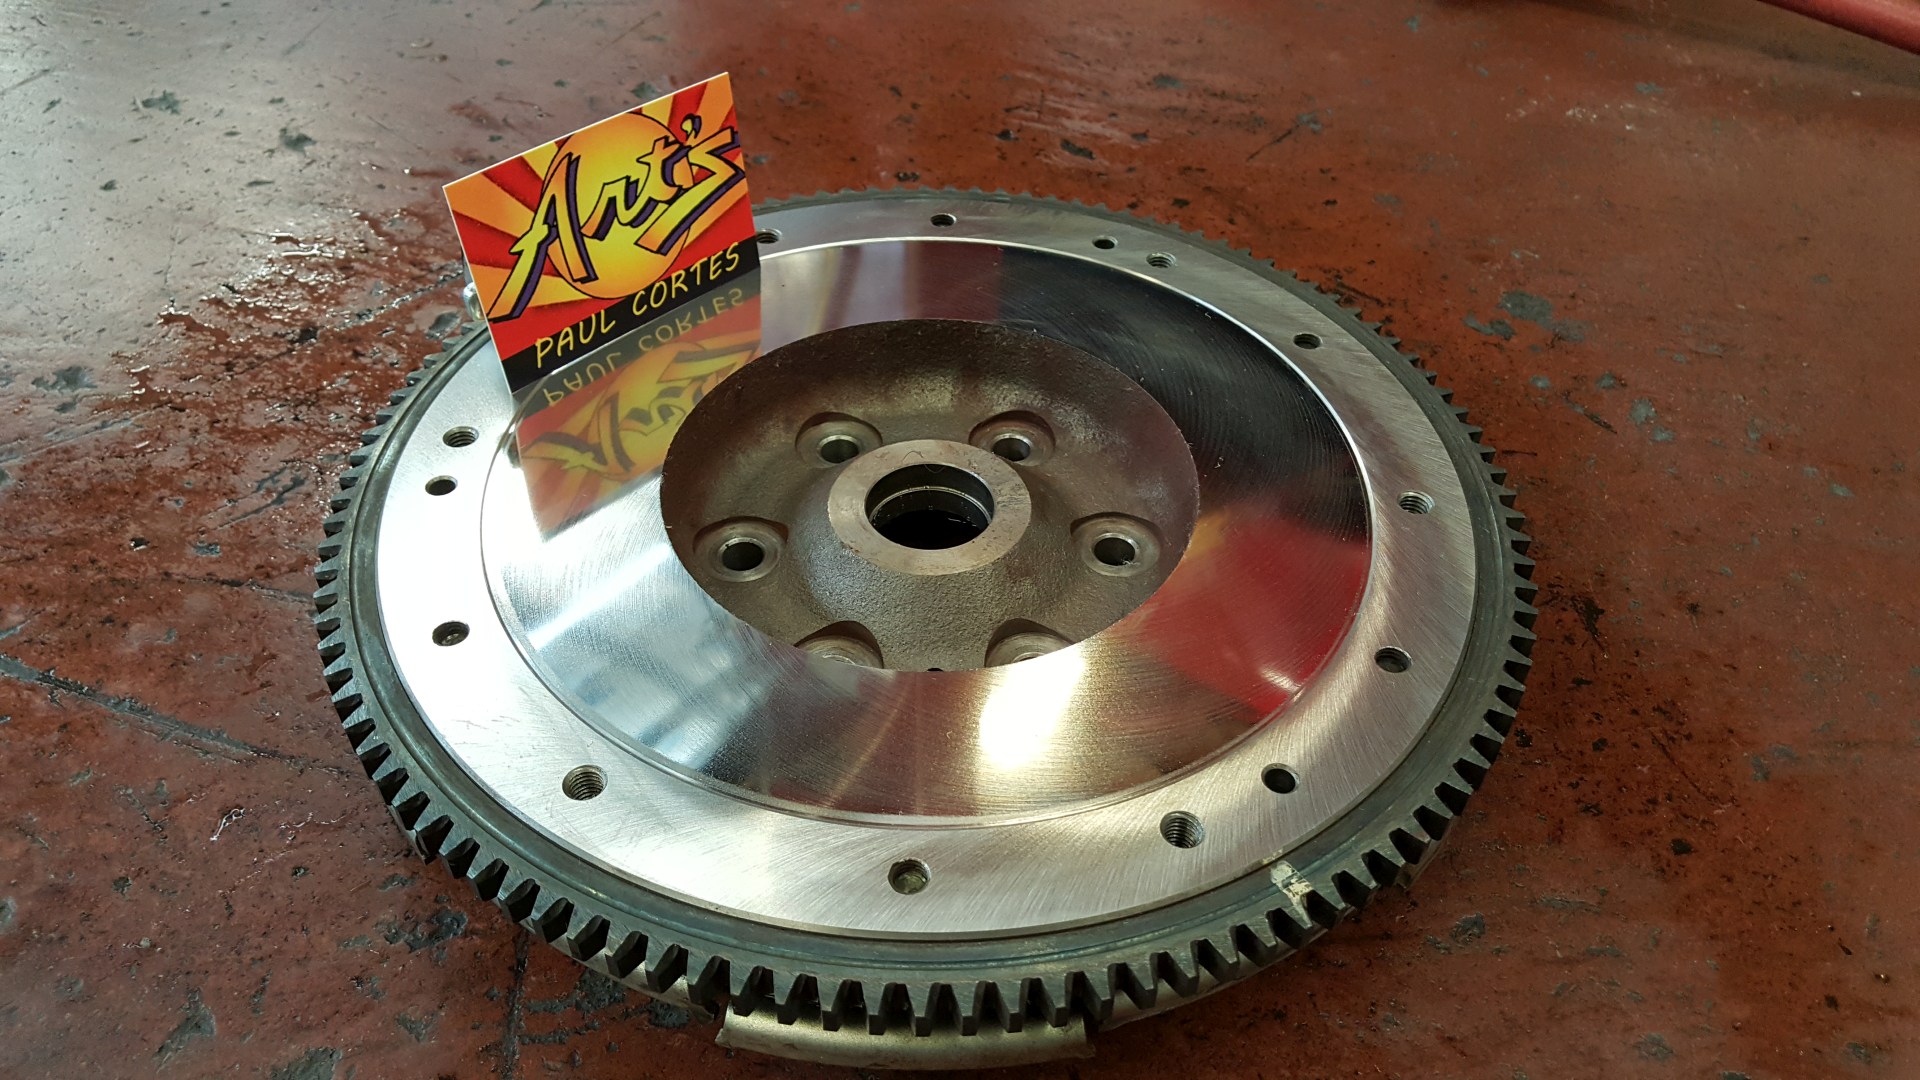
This is the flywheel after grinding. The friction surface has been ground perfectly flat and the “step” (the area the pressure plate bolts to has also been ground to maintain the original flywheel dimensions.
Clutch assembly and function
Flywheel and disc
First the flywheel is installed on the car, then the clutch disc, then the pressure plate. Since it’s hard to take pictures of this with these parts on the car, I took the pictures on the bench.
The clutch disc fits between the flywheel and pressure plate after bolting the flywheel to the crankshaft. Some mechanics feel this is the only part that should be replaced during a clutch repair unless other parts are obviously worn out. Not us. Since the bulk of the repair cost for a clutch job is labor, all of the parts should be replaced with every clutch repair, even if they seem OK.
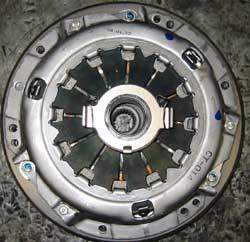
Pressure plate
Now the pressure plate is bolted to the flywheel. Since the transmission input shaft will need to pass through both the disc and pilot bearing in the flywheel, and alignment tool is used to align the disc and flywheel while bolting them together. The pressure plate and flywheel are aligned with dowel pins in the flywheel, so no additional tools are needed.
Clutch release bearing
Next in line is the clutch release bearing. This part slides in and out on a sleeve built into the transmission case. The clutch assembly rotates with the engine. One half of the release bearing is stationary, the other rotates when it presses on the pressure plate levers. The bearing moves when the driver presses the clutch pedal. When it moves the levers on the pressure plate, the pressure plate stops sandwiching the disc and flywheel together. The flywheel is attached to the engine and the disc is attached to the transmission input shaft, so this disengages the clutch.
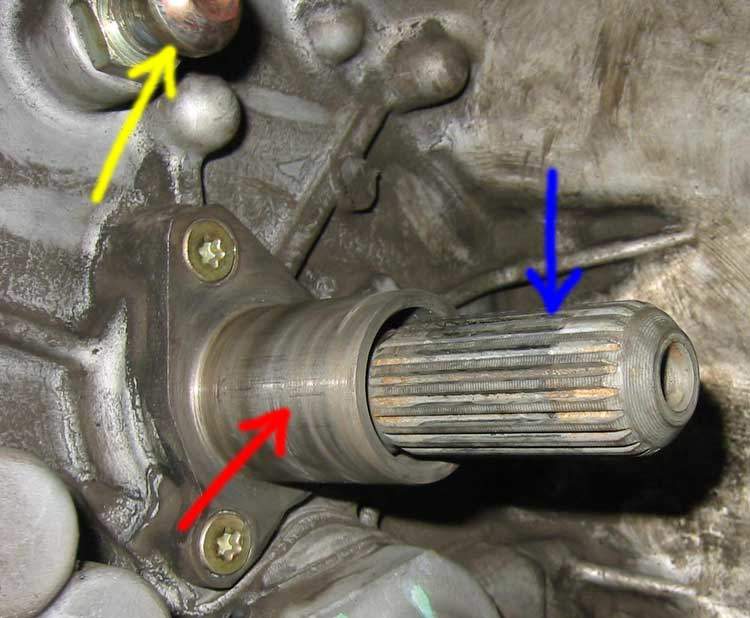
Release bearing sleeve and release bearing fork pivot
This is a picture of the inside of the transmission bell housing. The yellow arrow is pointing to a pivot point for the release bearing fork. The release bearing fork is like a teeter totter. On one side the lever is a hydraulic slave cylinder or clutch cable that will move when you step on the clutch cable.
On the other side is the release bearing that presses against the pressure plate release levers to disengage the clutch.
The red arrow is pointing to the release bearing sleeve. This is where the release bearing rides. The blue arrow is pointing to the input shaft splines. We lubricate all of these points with Honda Super Urea grease to prevent noise or stiffness in the clutch.
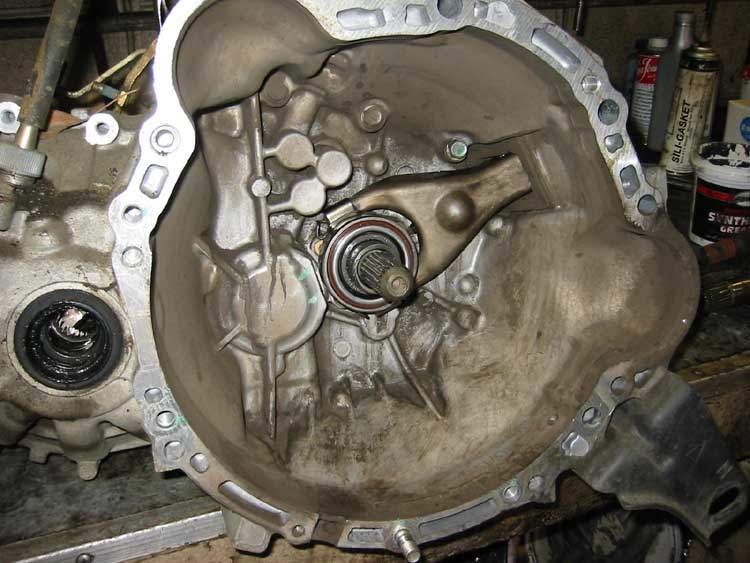
Here’s the inside of the transmission bell housing again, but now the clutch release bearing and fork have been installed.
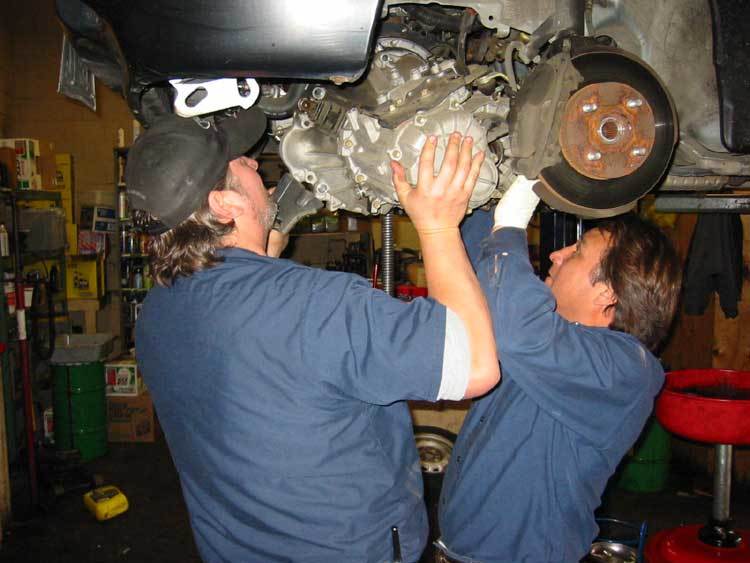
After installing completing the clutch replacement we put the transmission back into the car. When I asked Erick why he didn’t use one of the $1000 transmission jacks we own, he said he could have the transmission installed in the time it would take to pull the jack out and mount the transmission to it, and he was right. It took 20 seconds from the bench to the car.